Tinkercad
Table of Contents
Tinkercad makes it easy to rapidly prototype, build, and simulate circuits in a software environment. And, for those that do not have access to electronic tools, Tinkercad also provides a simple multimeter and oscilloscope—so we can test and measure our circuits too!
Here’s how to get setup in Tinkercad:
Step 1: Open Tinkercad Circuits
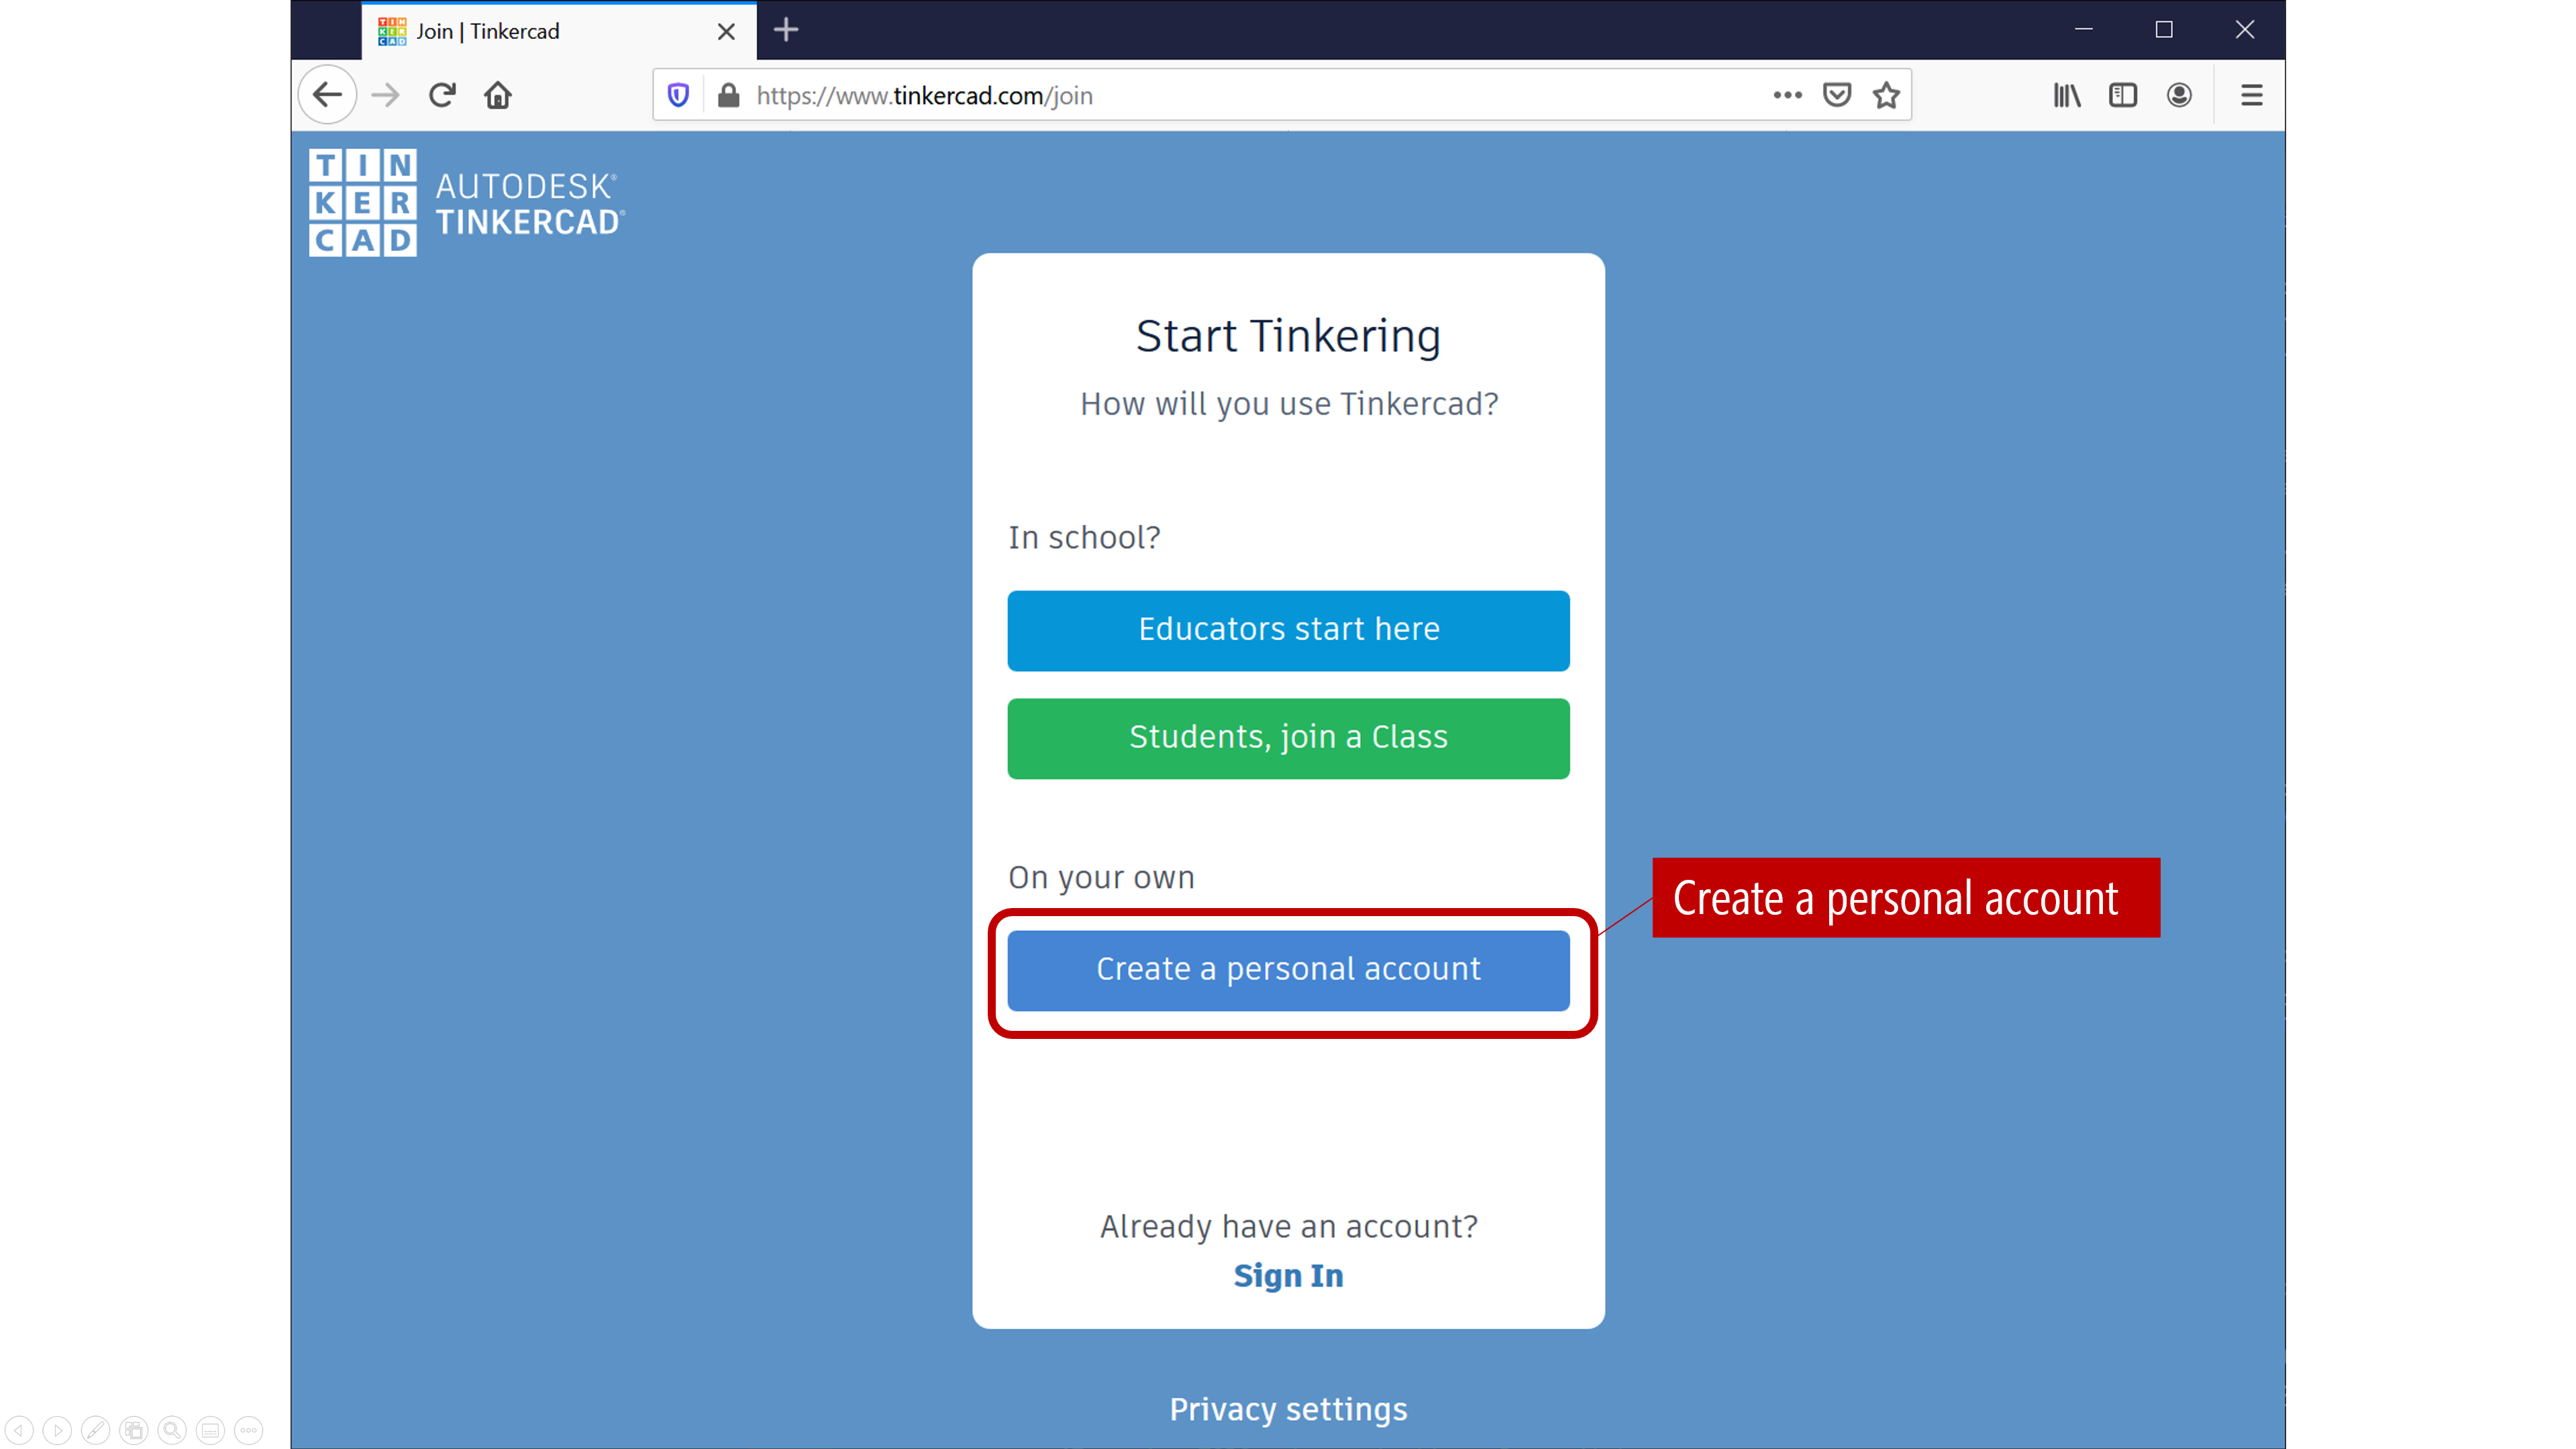
Visit tinkercad.com and login (if you already have an Autodesk account) or register if not. We are not using any of the “In School” features, so create a personal account:
Step 2: Create a new circuit
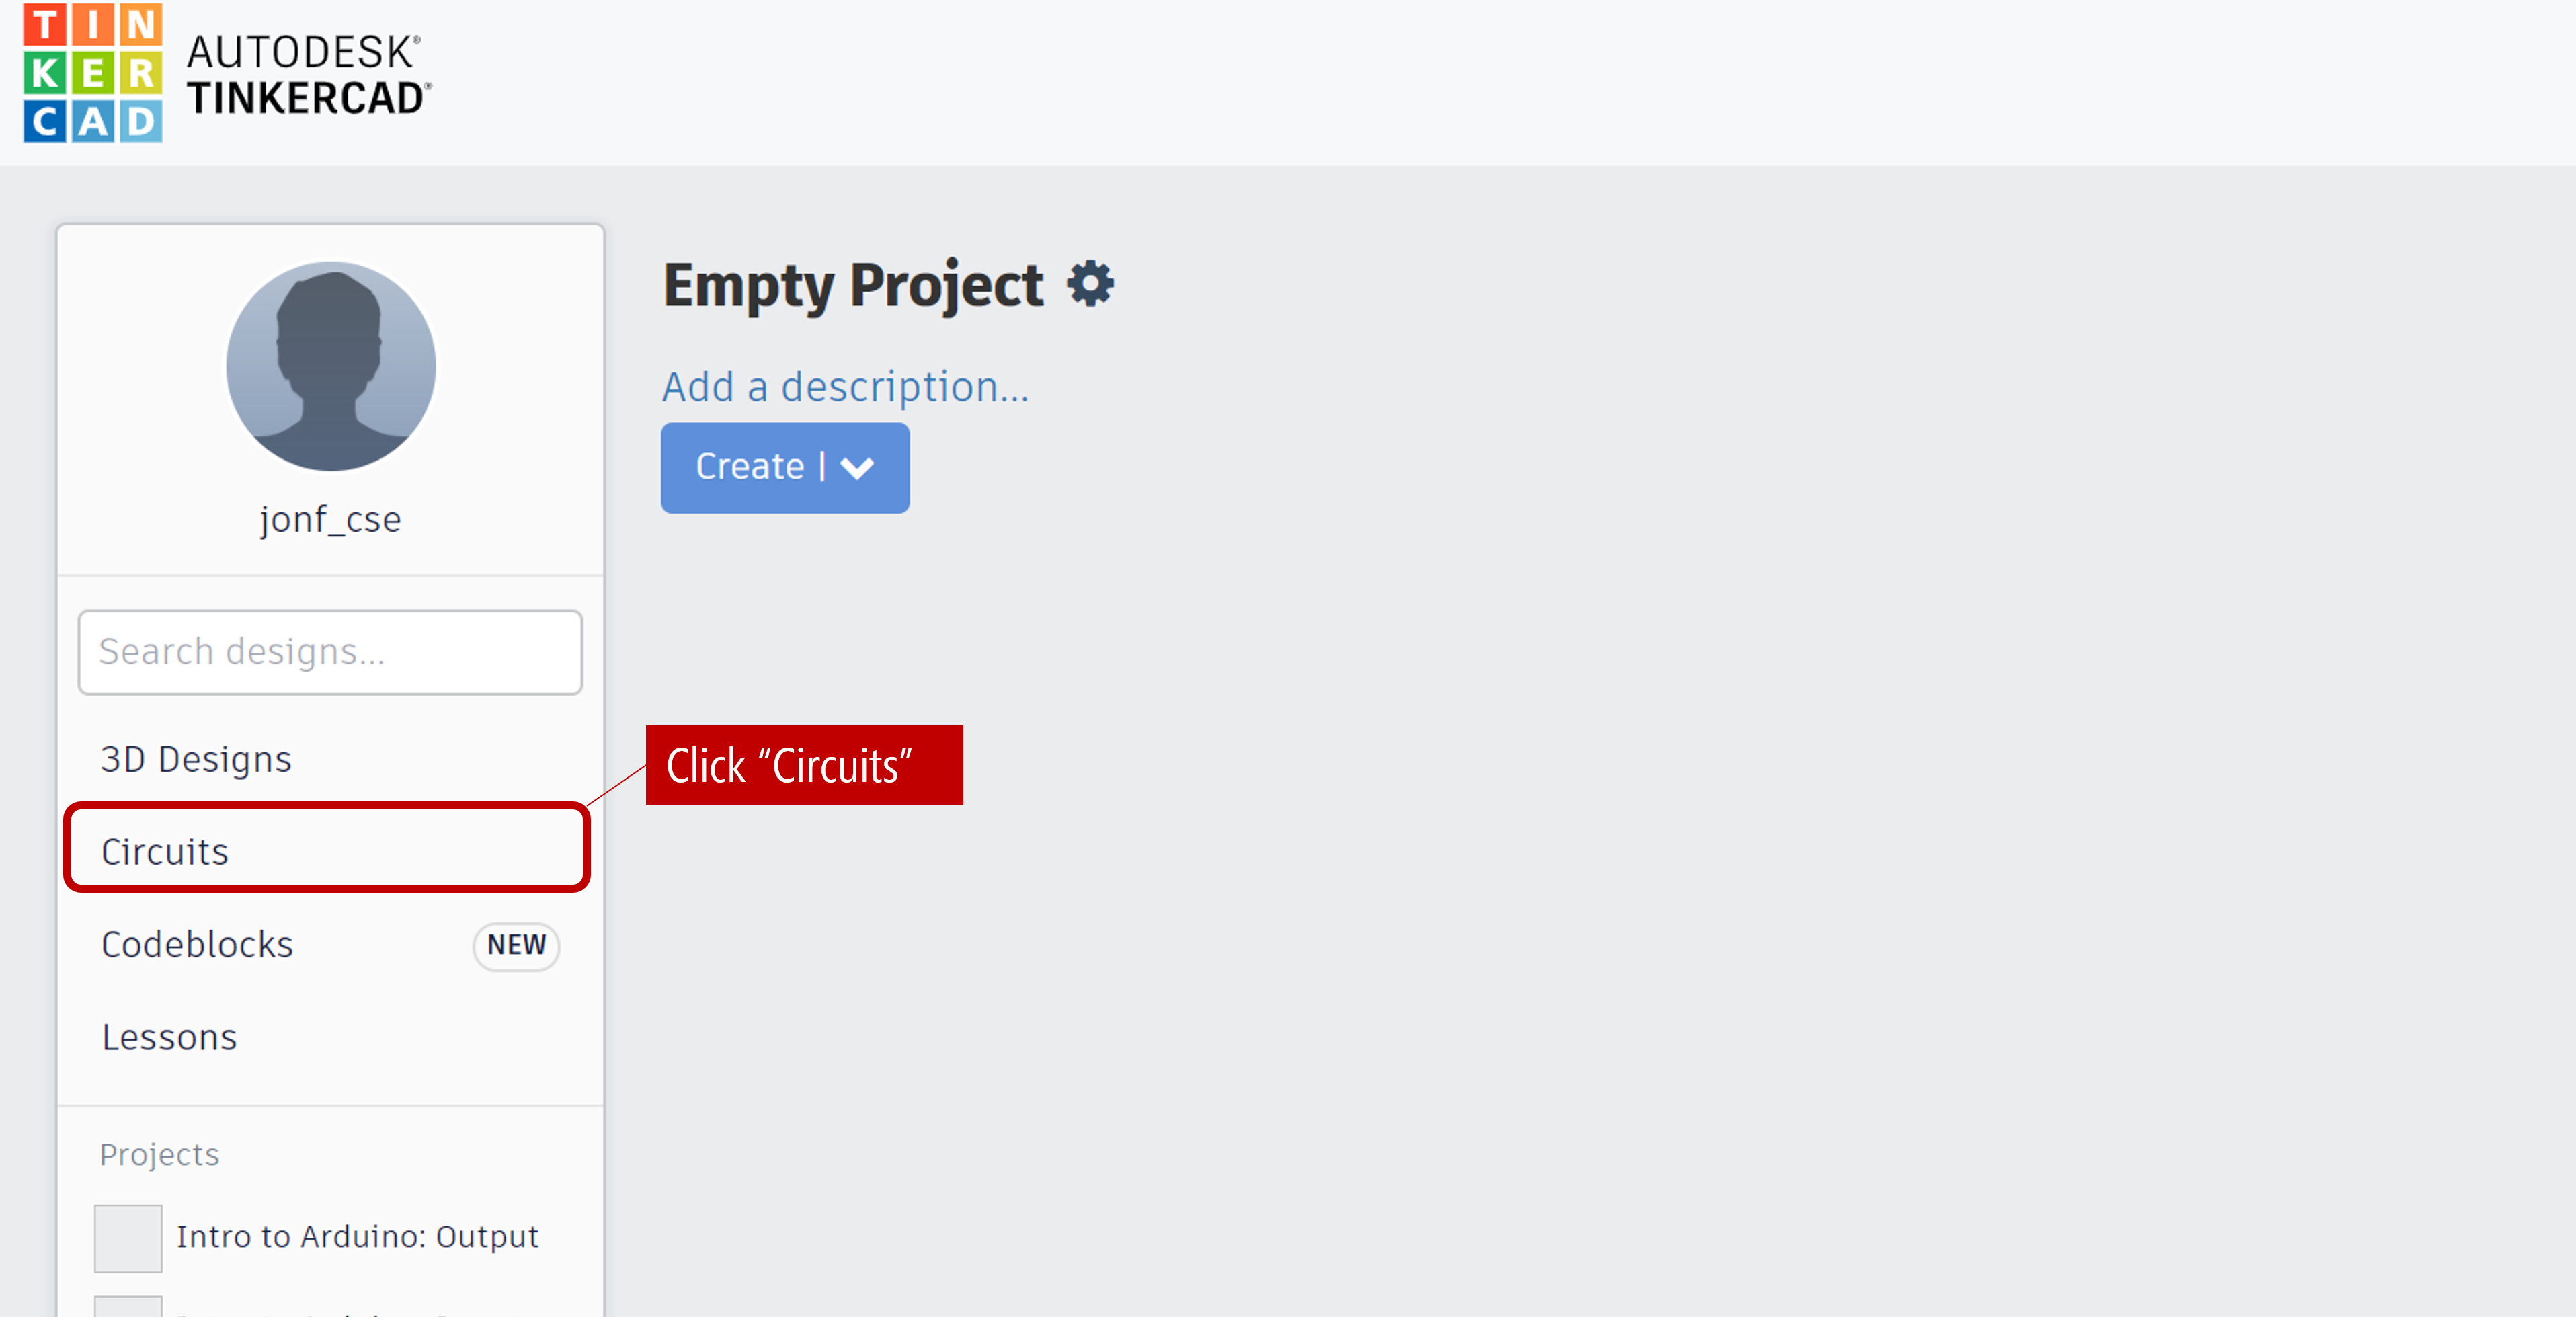
In your dashboard, click on “Circuits”:
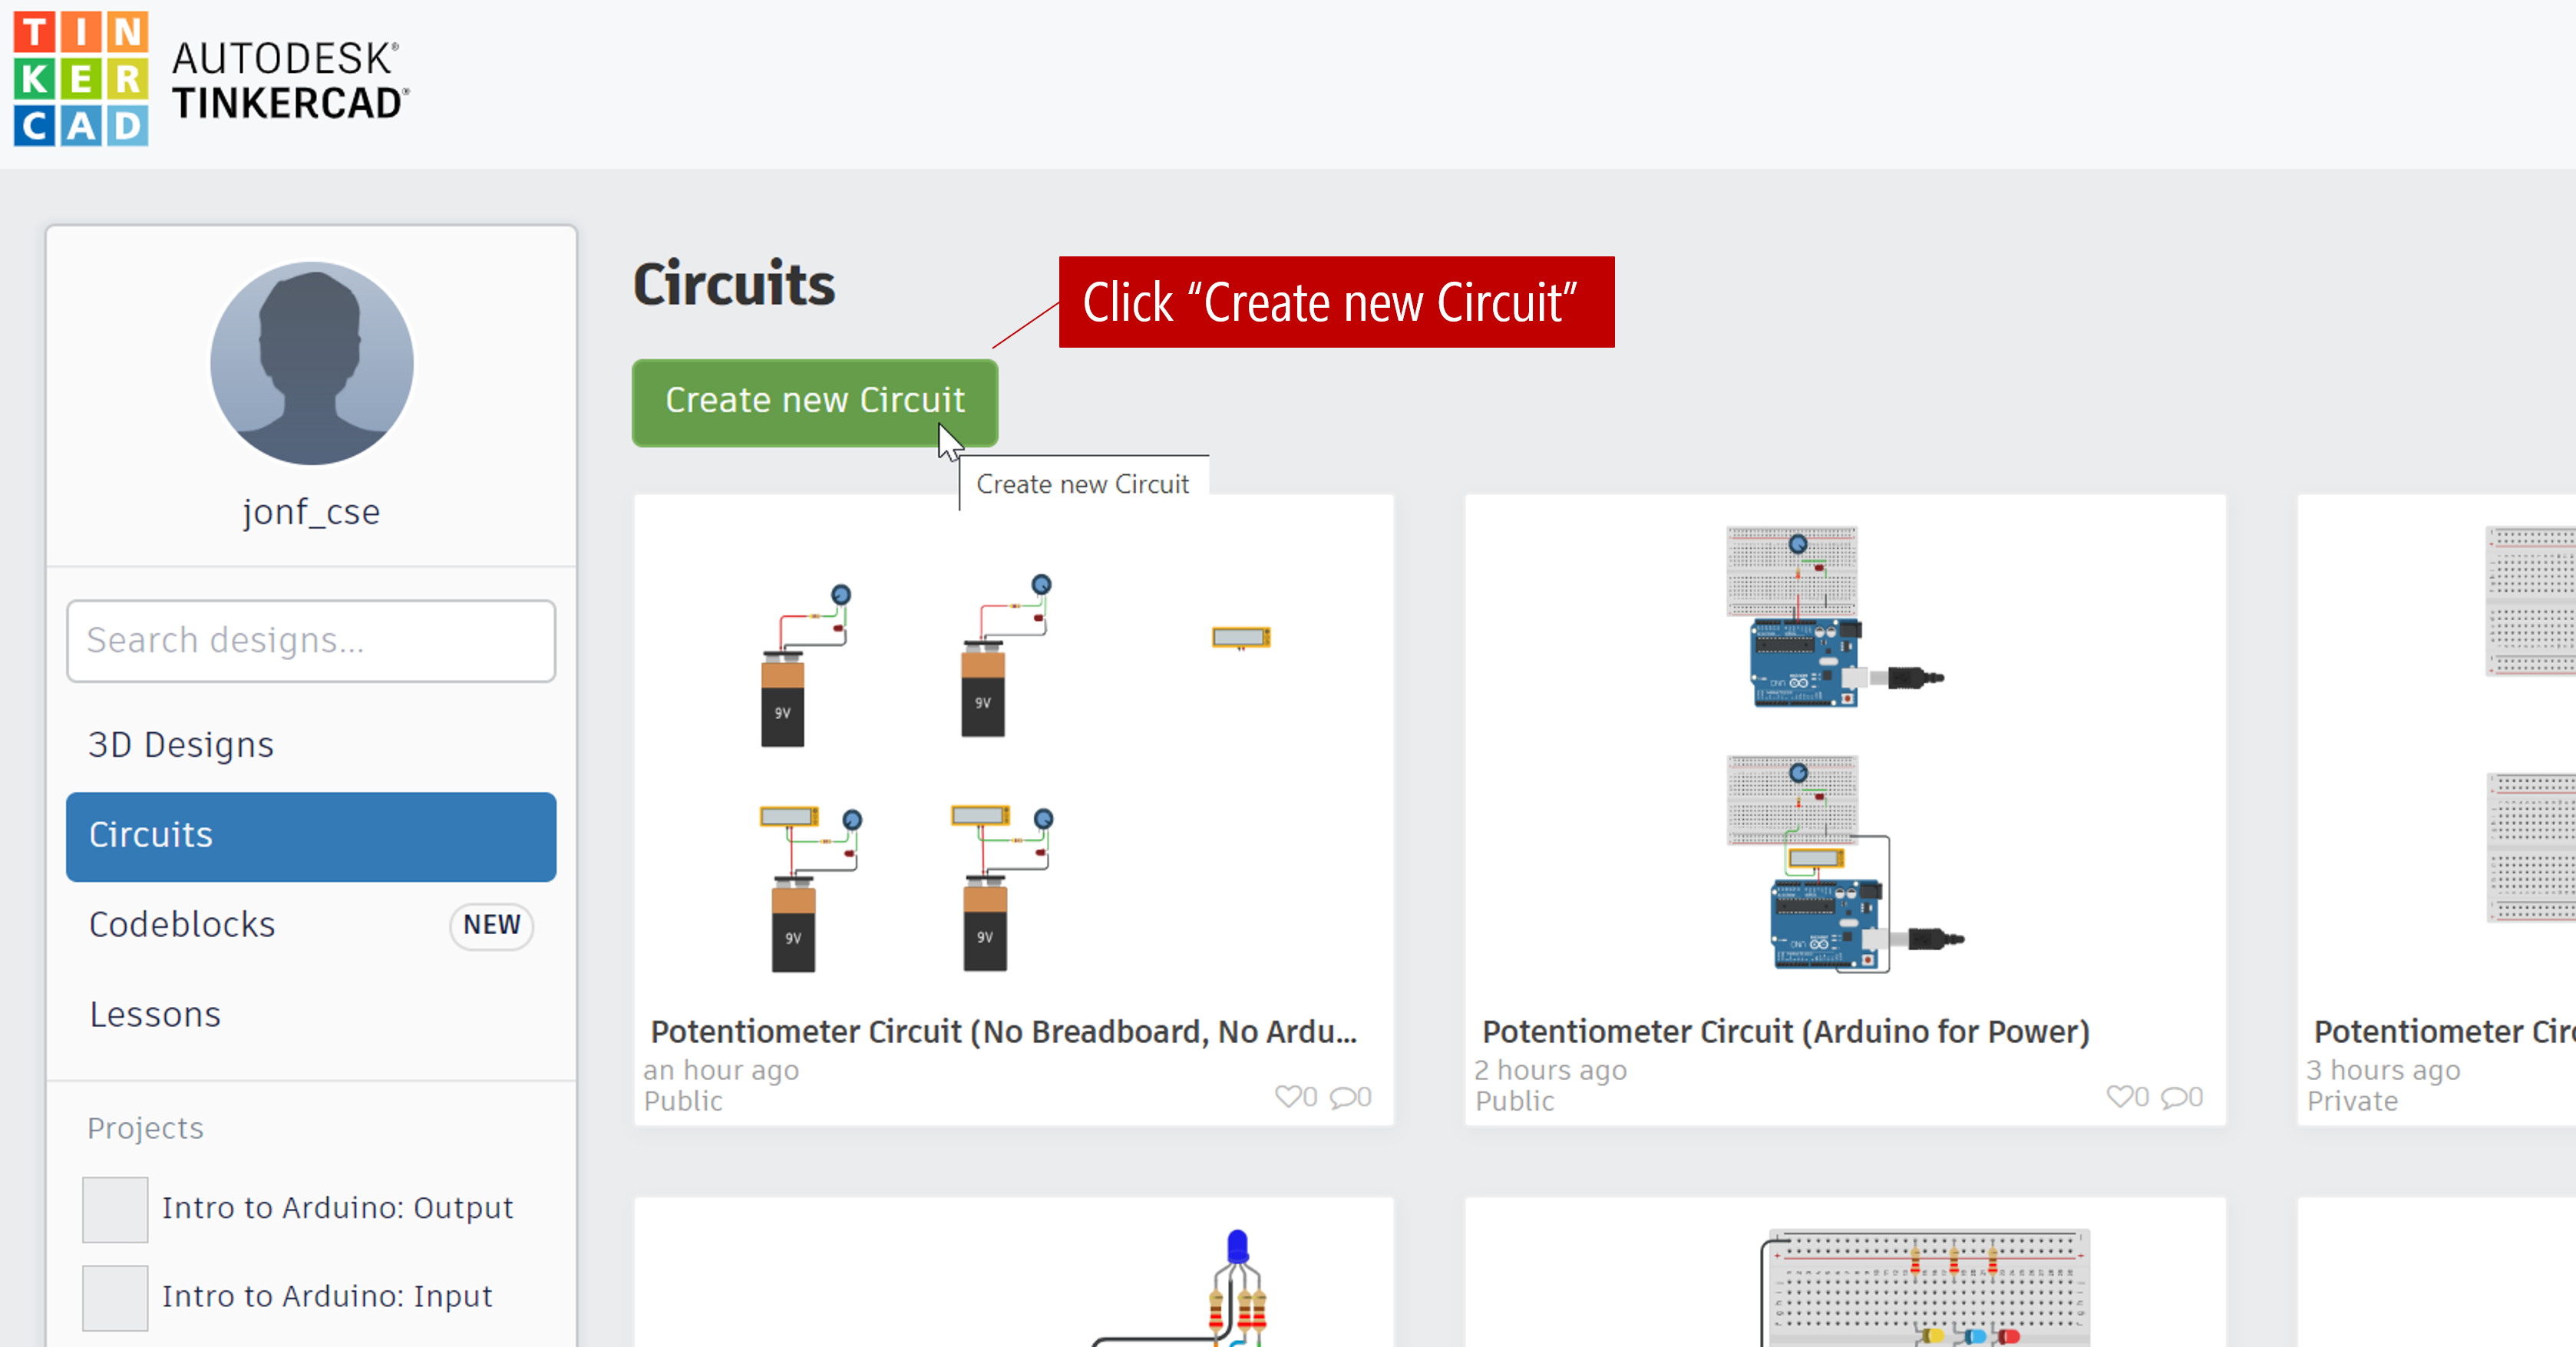
Then click on “Create new Circuit”:
Step 3: Aquaint yourself with Tinkercad
Tinkercad works by dragging and dropping components from the right sidebar menu onto the Circuit canvas. You can click on the “Start Simulation” button to simulate circuits (and even Arduino code + circuits).
If you’ve dragged over an Arduino, you can also click on the “Code” button and write code either in C/C++ or in a visual, block-based language. The simulator even has a “Serial Monitor”, “Serial Plotter”, and, wait for it, a simplistic debugger with breakpoint support!
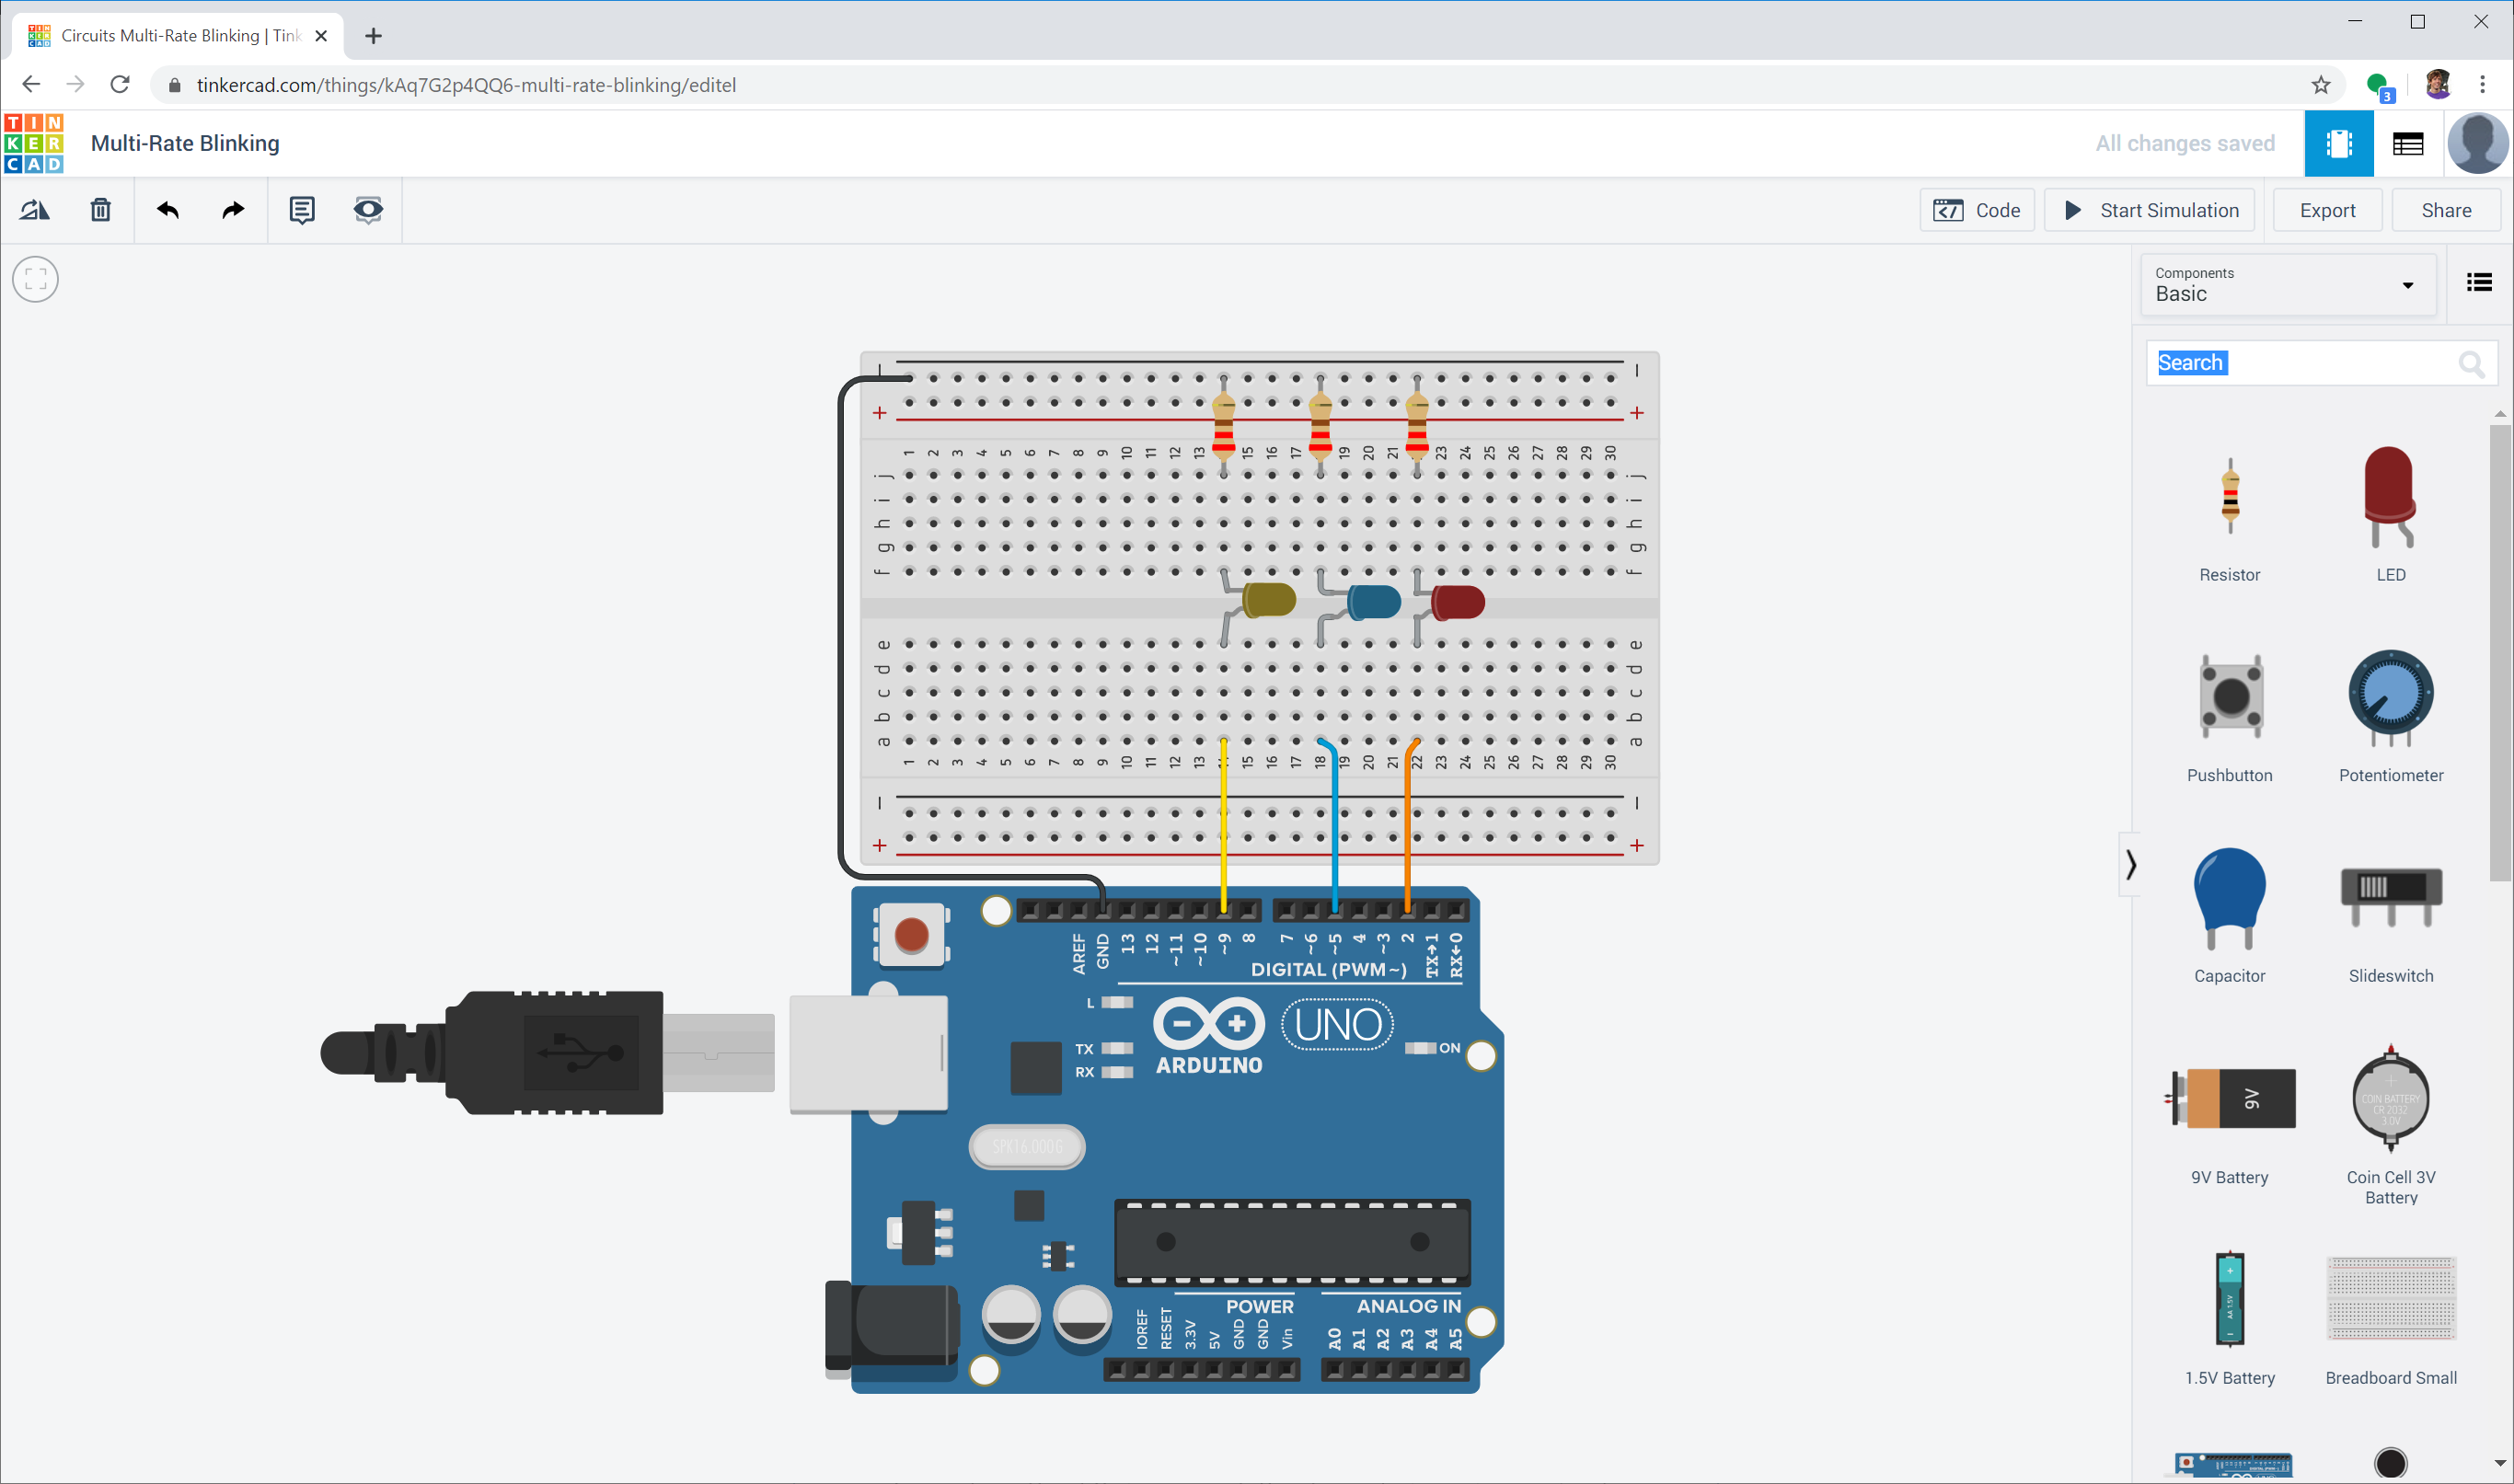 An example of the multi-rate blinking lesson created in Tinkercad. Try it out!