Lesson 4: Introduction to BLE
Table of Contents
- What is BLE?
- How BLE works
- Choosing between WiFi, Bluetooth Classic, and BLE
- The ESP32 BLE library
- Materials
- Part 1: Advertising and discovery
- Part 2: Streaming sensor data with notifications
- Exercises
- Lesson Summary
- Resources
- Next Lesson
This lesson is in draft form. There are missing circuit diagrams, images, videos, and other content.
In the last two lessons, we used Bluetooth Classic to create a wireless serial connection—simple, fast, and satisfying. But it came with real limitations: no iPhone support, no ESP32-S3 support, higher power consumption, and only one device at a time. In this lesson, we’ll learn Bluetooth Low Energy (BLE)—the protocol that powers your Fitbit, your AirPods’ pairing process, your smart thermostat, and billions of IoT devices worldwide.
BLE is more complex than Bluetooth Classic. Instead of a simple serial byte stream, BLE organizes data into a structured model of services and characteristics. This takes some getting used to—but that structure is exactly what makes BLE so powerful and ubiquitous. And unlike Bluetooth Classic, BLE works on the ESP32-S3, works with iPhones, and—as we’ll see—even works directly from a web browser.
In this lesson, you will learn:
- What BLE is and how it fundamentally differs from Bluetooth Classic
- The BLE communication model: peripherals and centrals, advertising and connecting
- The GATT data model: servers, services, characteristics, and UUIDs
- How to use the ESP32 BLE library to create a BLE peripheral that exposes sensor data
- How to read and subscribe to BLE characteristics from a phone app (nRF Connect) and from Python (bleak)
- How to stream real-time sensor data using BLE notifications
- The 20-byte MTU payload limit and how to work within it
Did you skip the Bluetooth Classic lessons? No problem. This lesson is self-contained—you don’t need Bluetooth Classic experience to follow along. We’ll briefly cover how BLE differs from Classic in the first section. If you want the full comparison, see Lesson 2: Bluetooth Serial and Lesson 3: Bluetooth Web Serial. And unlike Bluetooth Classic, which is blocked on iOS and only works on the original ESP32, BLE works with iPhones, Android phones, and the ESP32-S3—so everyone can participate.
What is BLE?
Bluetooth Low Energy (BLE) is a wireless communication protocol introduced in Bluetooth 4.0 (2010). Despite sharing the “Bluetooth” name with Bluetooth Classic, BLE is a completely different protocol stack designed from the ground up for low-power, intermittent data exchange. Where Bluetooth Classic was built for continuous streaming (music, file transfers, serial bridges), BLE was built for devices that send small amounts of data infrequently—a heart rate monitor broadcasting a reading every second, a door sensor reporting open/closed, a fitness tracker uploading step counts.
This design priority—extreme power efficiency—is what makes BLE transformative for physical computing. A BLE sensor can run for months or even years on a coin cell battery. That’s not possible with Bluetooth Classic or WiFi.
BLE is not “wireless serial.” This is the single most important conceptual shift in this lesson. If you’ve used
Serial.println()over USB orSerialBT.println()over Bluetooth Classic, you’re used to a continuous byte stream—data flows like water through a pipe. BLE doesn’t work that way. Instead, BLE organizes data into discrete, named characteristics that can be read, written, or subscribed to. Think less “serial port” and more “structured data API.”
If you completed Lessons 2 and 3, here’s a quick comparison:
| Feature | Bluetooth Classic (L2–L3) | BLE (this lesson) |
|---|---|---|
| Data model | Continuous byte stream | Structured characteristics |
| API feel | Like Serial | Like a REST API |
| Power | Higher | Very low |
| iOS support | ❌ (Apple blocks SPP) | ✅ |
| ESP32-S3 | ❌ | ✅ |
| Typical range | ~10m | ~10m |
| Max throughput | ~3 Mbps | Up to 2 Mbps (BLE 5.0 PHY), but practical throughput is much lower |
| Complexity | Very simple | More setup, more concepts |
Table. Key differences between Bluetooth Classic (Lessons 2–3) and BLE (this lesson). BLE trades simplicity for universality, power efficiency, and structured data.
How BLE works
BLE communication involves two fundamental concepts: roles (who talks to whom) and the GATT data model (how data is organized). Let’s take these one at a time.
Peripherals and centrals
Every BLE interaction has two roles:
-
A peripheral advertises its presence and hosts data. In our lessons, this is always the ESP32. Think of it as a weather station mounted on a wall—it has data (temperature, humidity) and it waits for someone to come read it.
-
A central scans for peripherals, initiates connections, and reads or writes data. In our lessons, this is your phone or laptop. Think of it as a person walking up to the weather station to check the temperature.
The peripheral advertises by periodically broadcasting short packets (called advertisement packets) that say, in essence, “I’m here, my name is X, and I offer these services.” The central scans for these packets, finds the peripheral, and can then connect to it for richer data exchange.
These roles are about who initiates the connection, not who sends data. Once connected, data flows in both directions—the central can read from the peripheral and write to it. The terms “peripheral” and “central” replace the older “slave” and “master” terminology that you may encounter in older documentation.
The GATT data model
Once a central connects to a peripheral, how does it know what data is available? This is where GATT (Generic Attribute Profile) comes in. GATT defines how data is organized on a BLE peripheral, and it’s the conceptual heart of BLE.
Think of GATT as a structured bulletin board. The peripheral (ESP32) maintains a bulletin board organized into sections (services), and each section contains individual data items (characteristics). A central (your phone) walks up to the board, browses the sections, and reads or modifies specific items.
Here’s the hierarchy:
BLE Peripheral (GATT Server)
  └── Service (e.g., "Sensor Data")                    ← a category of related data
       ├── Characteristic (e.g., "Potentiometer")       ← a single data point
       │    ├── Value: 2847                             ← the actual data
       │    └── Properties: Read, Notify                ← what you can do with it
       └── Characteristic (e.g., "LED Color")
            ├── Value: [255, 0, 128]
            └── Properties: Read, Write
Services group related data. A peripheral can have multiple services—for example, one for sensor data and another for device information. Each service is identified by a UUID (more on this below).
Characteristics are the individual data points within a service. Each characteristic has:
- A UUID (a unique identifier—like a name or address for this data point)
- A value (the actual data—up to 512 bytes, though typically much smaller)
- Properties that define how the characteristic can be accessed:
- Read: the central can request the current value (like polling)
- Write: the central can set the value (like sending a command)
- Notify: the peripheral pushes updates to the central automatically when the value changes—this is the most efficient way to stream data, because the central doesn’t have to keep asking
- Indicate: like Notify but the central sends an acknowledgment (rarely needed for our use cases)
Why so much structure? If the GATT model feels over-engineered for reading a potentiometer, that’s because it was designed for a much broader world of devices—from heart rate monitors to smart locks to industrial sensors. The structure lets any BLE central discover what a peripheral offers without prior knowledge. Your phone’s Bluetooth settings can show that a nearby device has a “Battery Service” at level 73% without needing a custom app—because “Battery Service” and “Battery Level” are standard UUIDs that every BLE stack understands. This interoperability is BLE’s superpower.
UUIDs: identifying services and characteristics
Every service and characteristic needs a unique identifier. BLE uses UUIDs (Universally Unique Identifiers) for this.
16-bit UUIDs are reserved by the Bluetooth SIG for standard, well-known services and characteristics. For example:
0x180F= Battery Service0x181A= Environmental Sensing Service0x2A19= Battery Level characteristic0x2A6E= Temperature characteristic
You can browse the full list in the Bluetooth SIG Assigned Numbers document.
128-bit UUIDs are for custom services and characteristics—anything you define for your own project. They look like this: 4fafc201-1fb5-459e-8fcc-c5c9c331914b. You can generate your own at uuidgenerator.net. In this lesson, we’ll use custom 128-bit UUIDs since we’re defining our own sensor and LED control services.
Don’t be intimidated by UUIDs. A 128-bit UUID is just a unique label—think of it like a URL or a barcode. You generate one, paste it into your code, and use the same one in your phone app or web page so both sides agree on which characteristic is which. You don’t need to memorize them or understand their internal structure.
A note on BLE security
In this lesson, we use BLE’s “Just Works” pairing mode, which requires no PIN and provides no protection against eavesdropping. This is fine for learning and for projects where the data isn’t sensitive (potentiometer readings, LED colors). For production IoT devices that handle sensitive data—door locks, health monitors, payment systems—you’d want to explore passkey pairing or out-of-band (OOB) authentication. See the Bluetooth SIG security overview for more.
Choosing between WiFi, Bluetooth Classic, and BLE
Now that you understand the BLE concepts — peripherals, centrals, GATT, services, characteristics, and UUIDs — you have enough context to see where BLE fits alongside the other wireless technologies you’ve learned. If you’ve completed Lesson 1 (WiFi/IoT) and Lessons 2–3 (Bluetooth Classic), here’s how all three compare:
| WiFi (L7) | Bluetooth Classic (L8) | BLE (this lesson) | |
|---|---|---|---|
| Best for | Cloud/internet connectivity | Wireless serial replacement | Low-power sensors, phones, web apps |
| Range | Depends on router | ~10m | ~10m |
| Power | High | Medium | Very low |
| iPhone support | ✅ (via web) | ❌ | ✅ |
| ESP32 (original) | ✅ | ✅ | ✅ |
| ESP32-S3 | ✅ | ❌ | ✅ |
| Complexity | Medium (needs WiFi credentials) | Very simple | Higher (GATT model) |
| Browser API | Fetch / WebSocket | Web Serial (via virtual COM port) | Web Bluetooth |
Table. Comparison of the three wireless technologies available on the ESP32. For most new projects, BLE is the default choice unless you need internet connectivity (WiFi) or a drop-in serial replacement (Bluetooth Classic). The original ESP32 supports all three; the ESP32-S3 supports WiFi and BLE but not Bluetooth Classic.
The ESP32 BLE library
The ESP32 Arduino core includes a built-in BLE library (source on GitHub, API docs). No installation is needed—just #include the headers and go.
The library is split across several header files, each providing a specific piece of the BLE puzzle:
| Header | What it provides |
|---|---|
BLEDevice.h | Top-level entry point. Initializes the BLE stack (call BLEDevice::init() once in setup()). |
BLEServer.h | Creates a GATT server on the ESP32 and manages connections. |
BLEUtils.h | Utility functions used internally by the library. Include it alongside the others. |
BLE2902.h | The Client Characteristic Configuration Descriptor (CCCD). Required for any characteristic that supports notifications — without it, centrals cannot subscribe. You only need this header when using PROPERTY_NOTIFY. |
You’ll typically #include all four at the top of your sketch. The key classes you’ll work with are:
| Class | Purpose |
|---|---|
BLEDevice | Initializes the BLE stack (call once in setup()) |
BLEServer | Creates a GATT server on the ESP32 |
BLEService | A service within the server (identified by UUID) |
BLECharacteristic | A data point within a service (identified by UUID, has value + properties) |
BLEAdvertising | Controls what the ESP32 broadcasts during advertising |
BLEServerCallbacks | Callback class for connection/disconnection events |
BLECharacteristicCallbacks | Callback class for read/write events on a characteristic |
Don’t worry about memorizing these—we’ll introduce each one as we use it in the activities below.
Alternative library: NimBLE-Arduino. The default BLE library uses the Bluedroid stack, which consumes roughly 170KB of RAM and ~500KB of flash. An alternative called NimBLE-Arduino provides a lighter-weight BLE stack that uses approximately 60% less flash and 50% less RAM, with a similar (though not identical) API. For the ESP32-S3 with its 4MB flash and 2MB PSRAM, the memory savings are less critical—but if you’re building a complex project that also uses WiFi, or targeting the ESP32-C3 with only 400KB SRAM, NimBLE is worth exploring. We use the default library in this lesson because it ships with the Arduino core, requires no installation, and is what most online tutorials reference.
Materials
You’ll need the following components. We use Adafruit’s ESP32-S3 Feather but any ESP32 board with BLE support will work (including the Huzzah32).
| Breadboard | ESP32 | LED | Resistor | Potentiometer |
|---|---|---|---|---|
 | 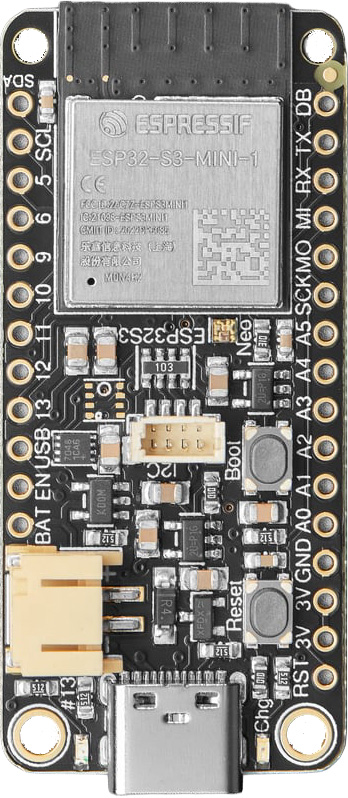 |  |  | 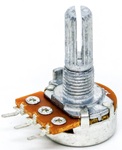 |
| Breadboard | ESP32-S3 Feather | Red LED | 220Ω Resistor | 10kΩ Potentiometer |
You will also need:
- Python 3 with the bleak library installed (
pip3 install bleak). Bleak is a cross-platform BLE library for Python—it works on macOS, Windows, and Linux. - A smartphone (iPhone or Android) with the free nRF Connect app by Nordic Semiconductor. Unlike Bluetooth Classic, BLE works with iPhones—so everyone can participate! Available on iOS and Android.
nRF Connect is a professional-grade BLE debugging tool made by Nordic Semiconductor (a major BLE chip manufacturer). It lets you scan for BLE devices, inspect their services and characteristics, read values, write data, and subscribe to notifications. It’s free, available on iOS and Android, and is the tool we’ll use throughout this lesson. Alternatives include LightBlue (iOS/Android) and BLE Scanner (Android).
Part 1: Advertising and discovery
Let’s start with the BLE equivalent of “Hello World”: create a GATT server on the ESP32 with a single readable characteristic, advertise it, and discover it from both your computer and your phone. By the end of this part, you’ll understand the full BLE setup lifecycle — initializing the stack, creating the GATT hierarchy, advertising, and handling connections — and you’ll have read your first BLE characteristic from nRF Connect.
The Arduino code
The full source is available in our Arduino GitHub repo.
/**
 * BLEHelloWorld: creates a BLE GATT server with one service and one
 * readable characteristic. The characteristic contains a greeting
 * string that you can read from any BLE central (like nRF Connect).
 *
 * Works on: ESP32-S3 Feather, Huzzah32, or any ESP32 with BLE.
 *
 * See: https://makeabilitylab.github.io/physcomp/esp32/ble
 *
 * By Jon E. Froehlich
 * @jonfroehlich
 * http://makeabilitylab.io
 */

#include <BLEDevice.h>
#include <BLEServer.h>
#include <BLEUtils.h>

// Custom UUIDs for our service and characteristic.
// Generated at https://www.uuidgenerator.net/
#define SERVICE_UUID        "4fafc201-1fb5-459e-8fcc-c5c9c331914b"
#define CHARACTERISTIC_UUID "beb5483e-36e1-4688-b7f5-ea07361b26a8"

bool _deviceConnected = false;

// Callback class to handle connection events
class MyServerCallbacks : public BLEServerCallbacks {
  void onConnect(BLEServer* pServer) {
    _deviceConnected = true;
    Serial.println("Central connected!");
  }

  void onDisconnect(BLEServer* pServer) {
    _deviceConnected = false;
    Serial.println("Central disconnected. Restarting advertising...");

    // IMPORTANT: restart advertising so other devices can find us again.
    // Without this, the ESP32 goes silent after the first disconnection.
    pServer->getAdvertising()->start();
  }
};

void setup() {
  Serial.begin(115200);
  Serial.println("Starting BLE Hello World...");

  // Step 1: Initialize the BLE stack with a device name.
  // This name appears when centrals scan for devices.
  BLEDevice::init("ESP32-BLE");

  // Step 2: Create a GATT server.
  BLEServer* pServer = BLEDevice::createServer();
  pServer->setCallbacks(new MyServerCallbacks());

  // Step 3: Create a service on the server (identified by UUID).
  BLEService* pService = pServer->createService(SERVICE_UUID);

  // Step 4: Create a characteristic within the service.
  // This characteristic is readable (PROPERTY_READ) — a central
  // can request its value.
  BLECharacteristic* pCharacteristic = pService->createCharacteristic(
    CHARACTERISTIC_UUID,
    BLECharacteristic::PROPERTY_READ
  );

  // Step 5: Set the initial value of the characteristic.
  pCharacteristic->setValue("Hello from ESP32!");

  // Step 6: Start the service (makes it visible to connected centrals).
  pService->start();

  // Step 7: Start advertising so centrals can discover us.
  BLEAdvertising* pAdvertising = BLEDevice::getAdvertising();
  pAdvertising->addServiceUUID(SERVICE_UUID);  // include our service UUID in ads
  pAdvertising->setScanResponse(true);         // allow a scan response packet
  pAdvertising->start();

  Serial.println("BLE server is advertising. Open nRF Connect and scan!");
}

void loop() {
  // Nothing to do here yet — the BLE stack runs in the background.
  // We'll add sensor reading and notifications in Part 2.
  delay(1000);
}
Let’s walk through the key steps:
Step 1: BLEDevice::init("ESP32-BLE") initializes the Bluetooth stack and sets the device name that appears during scanning. This is analogous to SerialBT.begin("ESP32-Bluetooth") from Lesson 2, but the similarity ends here—BLE has no println() or read() on the device object.
Step 2: Creating the server and registering callbacks. BLEDevice::createServer() creates a GATT server, and pServer->setCallbacks(new MyServerCallbacks()) registers a callback — a function (or in this case, a class with methods) that the BLE library will call automatically when specific events happen, like a central connecting or disconnecting. If you’ve used event listeners in JavaScript or interrupt handlers on Arduino, callbacks are the same idea: instead of polling for events in loop(), you tell the library “call this function when that happens.” We define MyServerCallbacks above setup() with two methods: onConnect() and onDisconnect().
Steps 3–4: Creating the GATT hierarchy. We create a service within the server (identified by SERVICE_UUID) and a characteristic within that service (identified by CHARACTERISTIC_UUID). The characteristic has PROPERTY_READ, meaning a central can request its value. This is the GATT structure we discussed earlier, built in code.
Step 5: Setting the value. pCharacteristic->setValue("Hello from ESP32!") stores a string in the characteristic. When a central reads this characteristic, it receives this string.
Steps 6–7: Starting the service and advertising. pService->start() activates the service so connected centrals can see it. pAdvertising->start() begins broadcasting advertisement packets. We include our service UUID in the advertisement (addServiceUUID) so centrals filtering by service can find us.
The onDisconnect callback revisited. Look back at the MyServerCallbacks class we registered in Step 2. The onDisconnect() method contains a critical line: pServer->getAdvertising()->start(). This is because when a central disconnects, the ESP32 stops advertising by default. If you don’t restart advertising in onDisconnect(), the ESP32 goes silent and no new centrals can find it. Always restart advertising after disconnection.
Discovering the ESP32 from your computer (Python)
Let’s start on the computer, where debugging is easiest. We’ll use bleak — a cross-platform BLE client library for Python that works on macOS, Windows, and Linux. Unlike pySerial (which we used for Bluetooth Classic in Lesson 2), bleak speaks BLE natively — it connects directly to BLE peripherals, discovers their GATT services, and reads/writes characteristics using Python’s asyncio for non-blocking I/O. If you haven’t installed it yet:
pip3 install bleak
Here’s a script that scans for BLE devices, connects to the ESP32, and reads our characteristic:
"""
ble_discover.py: Scans for BLE devices, connects to the ESP32,
and reads the greeting characteristic.

Requires: bleak (pip3 install bleak)

By Jon E. Froehlich
@jonfroehlich
http://makeabilitylab.io
"""

import asyncio
from bleak import BleakScanner, BleakClient

SERVICE_UUID = "4fafc201-1fb5-459e-8fcc-c5c9c331914b"
CHARACTERISTIC_UUID = "beb5483e-36e1-4688-b7f5-ea07361b26a8"

async def main():
    print("Scanning for BLE devices...")
    devices = await BleakScanner.discover(timeout=5.0)

    target = None
    for d in devices:
        print(f"  Found: {d.name} ({d.address})")
        if d.name and "ESP32" in d.name:
            target = d

    if target is None:
        print("Could not find ESP32 BLE device. Is the sketch running?")
        return

    print(f"\nConnecting to {target.name} ({target.address})...")
    async with BleakClient(target.address) as client:
        print(f"Connected: {client.is_connected}")

        # Read the greeting characteristic
        value = await client.read_gatt_char(CHARACTERISTIC_UUID)
        text = value.decode("utf-8")
        print(f"Read from characteristic: {text}")

asyncio.run(main())
Run it:
python3 ble_discover.py
You should see the ESP32 in the scan results and then read "Hello from ESP32!" from the characteristic. 🎉
Compare with pySerial from Lesson 2. With Bluetooth Classic, you used
serial.Serial()to open a virtual COM port—the same API as USB serial. With BLE, there’s no virtual COM port; you usebleak’sBleakClientto connect directly to the device and read structured characteristics. This is the fundamental difference between the two Bluetooth flavors.
Discovering the ESP32 from your phone (iPhone and Android)
Once you’ve confirmed the ESP32 is working from your computer, let’s try it from your phone. This works on both iPhones and Android phones—unlike Bluetooth Classic, which was Android-only.
- On your iPhone or Android phone, open the nRF Connect app (iOS / Android).
- Tap Scan (top right). You should see
"ESP32-BLE"in the list of discovered devices.
- Tap Connect next to
"ESP32-BLE". The app will connect and display the GATT server structure. You should see your custom service (listed by its UUID) with one characteristic underneath.
- Tap the read arrow (↓) next to the characteristic. You should see
"Hello from ESP32!"appear as the value. You just read data from a BLE peripheral on your phone!
What you’re seeing in nRF Connect is the GATT structure we built in code: one service containing one characteristic. nRF Connect shows the UUIDs for each. Since we used custom 128-bit UUIDs (not standard Bluetooth SIG UUIDs), nRF Connect displays them as “Unknown Service” and “Unknown Characteristic”—it doesn’t know what our custom UUIDs mean. If we’d used a standard UUID like
0x181A(Environmental Sensing), nRF Connect would display the name automatically.
Workbench demo
Part 2: Streaming sensor data with notifications
Reading a static string is a good start, but the real power of BLE comes with notifications — the peripheral automatically pushes updates to the central whenever a value changes. In this part, you’ll wire up a potentiometer, learn how to add PROPERTY_NOTIFY and the BLE2902 descriptor, and stream live sensor data to both nRF Connect and a Python script. This is the BLE equivalent of Serial.println(sensorValue) — but structured and wireless.
The circuit
Connect a 10kΩ potentiometer to the ESP32-S3 Feather on pin A5 (GPIO 8), which is an ADC1 pin. This is the same potentiometer circuit from Lesson 4: Analog Input.
Using the Huzzah32 instead? (click to expand)
On the Huzzah32, use pin A7 (GPIO 32), which is an ADC1 pin. ADC2 pins conflict with both WiFi and Bluetooth on the original ESP32, so always use ADC1 for analog input when using wireless features.
The Arduino code
The full source is available in our Arduino GitHub repo.
/**
 * BLENotifySensor: reads a potentiometer and streams its value to
 * connected BLE centrals using notifications. Open nRF Connect,
 * connect, and subscribe to notifications to see live sensor data.
 *
 * Circuit:
 * - 10kΩ potentiometer on A5 (GPIO 8, ADC1) for ESP32-S3 Feather
 *   (use A7 / GPIO 32 for the Huzzah32)
 *
 * Works on: ESP32-S3 Feather, Huzzah32, or any ESP32 with BLE.
 *
 * See: https://makeabilitylab.github.io/physcomp/esp32/ble
 *
 * By Jon E. Froehlich
 * @jonfroehlich
 * http://makeabilitylab.io
 */

#include <BLEDevice.h>
#include <BLEServer.h>
#include <BLEUtils.h>
#include <BLE2902.h>

// Custom UUIDs — same service UUID as Part 1, new characteristic UUID for sensor data
#define SERVICE_UUID           "4fafc201-1fb5-459e-8fcc-c5c9c331914b"
#define SENSOR_CHAR_UUID       "beb5483e-36e1-4688-b7f5-ea07361b26a8"

const int POT_INPUT_PIN = A5; // GPIO 8, ADC1 on ESP32-S3 Feather

BLEServer* _pServer = NULL;
BLECharacteristic* _pSensorCharacteristic = NULL;
bool _deviceConnected = false;

// Timing for non-blocking sensor reads
unsigned long _lastSensorReadMs = 0;
const unsigned long SENSOR_READ_INTERVAL_MS = 100; // read sensor ~10x/sec

class MyServerCallbacks : public BLEServerCallbacks {
  void onConnect(BLEServer* pServer) {
    _deviceConnected = true;
    Serial.println("Central connected!");
  }

  void onDisconnect(BLEServer* pServer) {
    _deviceConnected = false;
    Serial.println("Central disconnected. Restarting advertising...");
    pServer->getAdvertising()->start();
  }
};

void setup() {
  Serial.begin(115200);
  Serial.println("Starting BLE Sensor Notify...");

  // Initialize BLE
  BLEDevice::init("ESP32-BLE-Sensor");
  _pServer = BLEDevice::createServer();
  _pServer->setCallbacks(new MyServerCallbacks());

  // Create service
  BLEService* pService = _pServer->createService(SERVICE_UUID);

  // Create characteristic with READ and NOTIFY properties
  _pSensorCharacteristic = pService->createCharacteristic(
    SENSOR_CHAR_UUID,
    BLECharacteristic::PROPERTY_READ |
    BLECharacteristic::PROPERTY_NOTIFY
  );

  // Add the BLE2902 descriptor — this is required for notifications.
  // It allows the central to enable/disable notifications on this characteristic.
  _pSensorCharacteristic->addDescriptor(new BLE2902());

  // Start the service and begin advertising
  pService->start();
  BLEAdvertising* pAdvertising = BLEDevice::getAdvertising();
  pAdvertising->addServiceUUID(SERVICE_UUID);
  pAdvertising->setScanResponse(true);
  pAdvertising->start();

  Serial.println("BLE server advertising. Connect with nRF Connect!");
}

void loop() {
  unsigned long now = millis();

  if (now - _lastSensorReadMs >= SENSOR_READ_INTERVAL_MS) {
    _lastSensorReadMs = now;

    int potVal = analogRead(POT_INPUT_PIN);

    // Always print to USB serial for debugging
    Serial.print("Pot:");
    Serial.println(potVal);

    // If a BLE central is connected, update the characteristic and notify
    if (_deviceConnected) {
      // Convert the integer to a string and set it as the characteristic value.
      // We could also send raw bytes for efficiency, but strings are easier
      // to read in nRF Connect for learning purposes.
      String valStr = String(potVal);
      _pSensorCharacteristic->setValue(valStr.c_str());
      _pSensorCharacteristic->notify();
    }
  }
}
There are two new elements here compared to Part 1:
PROPERTY_NOTIFY tells the BLE stack that this characteristic supports notifications. When a central subscribes to notifications, it will receive an automatic update every time we call notify().
BLE2902 descriptor. This is a BLE protocol requirement: the Client Characteristic Configuration Descriptor (CCCD), identified by UUID 0x2902, is a small piece of metadata that the central uses to enable or disable notifications. Without it, the central cannot subscribe. The line _pSensorCharacteristic->addDescriptor(new BLE2902()) adds this descriptor to our characteristic.
_pSensorCharacteristic->notify() pushes the current value to all subscribed centrals. We call this after updating the value with setValue(). If no central is subscribed, notify() does nothing.
Reading notifications from your computer (Python)
Here’s a Python script that subscribes to the potentiometer notifications and displays them in real time:
"""
ble_sensor_reader.py: Connects to the ESP32 BLE sensor and subscribes
to potentiometer notifications. Displays values with a live ASCII bar.

Requires: bleak (pip3 install bleak)

By Jon E. Froehlich
@jonfroehlich
http://makeabilitylab.io
"""

import asyncio
from bleak import BleakScanner, BleakClient

SERVICE_UUID = "4fafc201-1fb5-459e-8fcc-c5c9c331914b"
SENSOR_CHAR_UUID = "beb5483e-36e1-4688-b7f5-ea07361b26a8"

def on_notification(sender, data):
    """Called each time the ESP32 sends a notification."""
    text = data.decode("utf-8").strip()
    try:
        value = int(text)
        bar_length = int(value / 4095 * 50)
        bar = '█' * bar_length + '░' * (50 - bar_length)
        print(f"\r{bar} {value:4d}", end='', flush=True)
    except ValueError:
        print(f"\r{text}", end='', flush=True)

async def main():
    print("Scanning for ESP32-BLE-Sensor...")
    devices = await BleakScanner.discover(timeout=5.0)

    target = None
    for d in devices:
        if d.name and "ESP32" in d.name:
            target = d
            break

    if target is None:
        print("Could not find ESP32. Is the sketch running?")
        return

    print(f"Connecting to {target.name}...")
    async with BleakClient(target.address) as client:
        print(f"Connected! Turn the potentiometer.\n")

        # Subscribe to notifications
        await client.start_notify(SENSOR_CHAR_UUID, on_notification)

        # Keep running until Ctrl+C
        try:
            while True:
                await asyncio.sleep(1.0)
        except KeyboardInterrupt:
            print("\nStopping...")
            await client.stop_notify(SENSOR_CHAR_UUID)

asyncio.run(main())
Run it and turn the potentiometer—you’ll see a live bar chart updating in your terminal, with data arriving wirelessly over BLE:
python3 ble_sensor_reader.py
Compare with the Python Bluetooth Classic script from Lesson 2. In L2, you used
pyserial’sser.readline()to read data from a virtual COM port—a byte stream, just like USB serial. Here, you usebleak’sstart_notify()to subscribe to a specific BLE characteristic—a callback fires each time the ESP32 pushes a new value. The data arrives structured and event-driven rather than as a continuous byte stream.
Reading notifications from your phone (iPhone and Android)
Now try it from your phone:
- Open nRF Connect on your iPhone or Android phone.
- Scan and connect to
"ESP32-BLE-Sensor". - Expand the service and find the sensor characteristic.
- Tap the triple-down-arrow icon (⇊) to subscribe to notifications.
- Turn the potentiometer—you should see the value updating in real time on your phone!
Comparing with serial: In the Communication module, you call
Serial.println(sensorValue)and bytes flow continuously through the USB cable at 115,200 bps. With BLE, you update a characteristic value and callnotify()—the BLE stack delivers it at the negotiated connection interval (typically 7.5ms–4 seconds). BLE trades raw throughput for structured data, power efficiency, and wireless convenience.
The 20-byte payload limit
Try changing the setValue() call to send a long string—something like "Potentiometer reading is: " + String(potVal). You’ll notice the value gets truncated in nRF Connect. Welcome to the 20-byte MTU limit!
By default, BLE’s ATT (Attribute Protocol) layer has a Maximum Transmission Unit (MTU) of 23 bytes. After 3 bytes of protocol overhead, that leaves 20 bytes for your actual data. Any value longer than 20 bytes gets silently truncated.
You can negotiate a larger MTU (up to 512 bytes) if both sides support it, but 20 bytes is the safe baseline that works with all BLE devices. For sensor data, this is rarely a problem—an integer like "2847" is only 4 bytes as a string (or 2 bytes as a raw uint16_t). But if you try to send long formatted strings, you’ll hit this limit.
Keep your BLE payloads compact. Send numbers as short strings or raw bytes, not verbose text. If you need to send more than 20 bytes, either negotiate a larger MTU (call
BLEDevice::setMTU(185)insetup(); both sides must agree), split the data across multiple characteristics, or send it in chunks.
Workbench demo
Exercises
Want to go further? Here are some challenges to reinforce what you’ve learned:
Exercise 1: BLE range test. With the notification sketch from Part 2 running, walk away from your ESP32 with nRF Connect open. At what distance do notifications stop arriving? How do walls and obstacles affect range? If you did the Bluetooth Classic range test in Lesson 3, Exercise 4, compare the two. Are they similar?
Exercise 2: Multiple sensor characteristics. Create a service with two notify characteristics: one for a potentiometer and one for a photoresistor. Subscribe to both in nRF Connect and observe both values updating simultaneously. This is good practice for structuring your GATT services.
Exercise 3: Connection status NeoPixel. Use the onboard NeoPixel to display BLE connection status: blue while advertising (waiting for a connection), green when a central is connected, and red briefly on disconnection before returning to blue. This is a common pattern in commercial BLE products. Implement it using the onConnect() and onDisconnect() callbacks. (Accessibility note: for colorblind users, consider also adding a blink pattern—e.g., slow pulse for advertising, solid for connected, fast blink for disconnection.)
Exercise 4: Power comparison (research). The ESP32-S3 Feather has a LiPoly battery connector and a MAX17048 battery monitor chip. Connect the 350mAh LiPoly battery from your kit and run a BLE sketch. How long does the battery last? Compare with a WiFi sketch (from the IoT lesson). Which protocol consumes more power? For bonus points, use BLEDevice::setPower() to experiment with different transmit power levels and measure the effect on both range and battery life.
Exercise 5: Port a Bluetooth Classic project to BLE. If you completed the potentiometer streaming project from Lesson 3, rebuild it using BLE. Replace BluetoothSerial with the BLE library, design your GATT service and characteristic, and update the computer-side code to use bleak instead of pySerial. What changed? What stayed the same?
Lesson Summary
In this lesson, you learned the fundamentals of Bluetooth Low Energy — a structured, low-power wireless protocol that’s fundamentally different from the serial-style Bluetooth Classic in Lessons 2–3. Here’s what you covered:
- BLE is not wireless serial. Instead of a continuous byte stream, BLE organizes data into structured services and characteristics with defined properties (read, write, notify). This structure enables interoperability across devices and applications.
- BLE uses a peripheral/central model. The ESP32 acts as a peripheral (advertising and hosting data), while your phone or laptop acts as a central (scanning, connecting, reading, and writing). Once connected, data flows in both directions.
- GATT (Generic Attribute Profile) is the data model at the heart of BLE. A GATT server contains services (categories of data), which contain characteristics (individual data points). Each service and characteristic is identified by a UUID.
- Notifications are the most efficient way to stream data. Instead of the central repeatedly polling, the peripheral pushes updates automatically when a value changes — dramatically reducing power consumption and latency.
- The ESP32 BLE library (
BLEDevice.h) ships with the ESP32 Arduino core and requires no installation. It uses a callback model (not polling) for connection events — a different programming pattern thanSerial.available(). - The
BLE2902descriptor must be added to any characteristic that supports notifications. Without it, centrals cannot subscribe. - The 20-byte MTU default means BLE payloads should be kept compact. Send numbers as short strings or raw bytes, not verbose text.
- After disconnection, the ESP32 stops advertising by default. Always restart advertising in your
onDisconnect()callback, or new centrals won’t be able to find the device. - BLE works on the ESP32-S3, works with iPhones, and consumes dramatically less power than Bluetooth Classic or WiFi. For most new wireless projects, BLE is the right default choice.
Resources
- ESP32 BLE Arduino library source and examples — the official library in the ESP32 Arduino core
- ESP32 Arduino BLE API documentation — Espressif’s API reference
- NimBLE-Arduino — lighter-weight alternative BLE stack (~60% less flash, ~50% less RAM)
- nRF Connect for Mobile — our recommended BLE debugging app (free, iOS + Android)
- bleak — cross-platform BLE client library for Python
- Bluetooth SIG Assigned Numbers — official list of standard service and characteristic UUIDs
- Bluetooth SIG: Security Overview — official overview of BLE security and pairing modes
- Getting Started with ESP32 BLE on Arduino IDE — Random Nerd Tutorials
Next Lesson
In the next lesson, you’ll learn how to send data in the other direction — from your phone or browser to the ESP32. You’ll control the onboard NeoPixel over BLE, build a Web Bluetooth interface with sliders and a color picker, and learn about the Nordic UART Service (NUS) for serial-like text communication over BLE. Let’s go! 🚀