Lesson 3: Bluetooth Web Serial
Table of Contents
- Materials
- Part 1: Streaming sensor data
- Part 2: Re-introducing serial.js
- Part 3: SerialTest — no install, no setup, just open and connect
- Part 4: Live visualization with p5.js
- Part 5: Bidirectional control — wireless color mixer
- Part 6: Android phone (optional bonus)
- Gotchas and limitations
- When to use Bluetooth Classic vs. BLE
- Exercises
- Lesson Summary
- Resources
- Next Lesson
This lesson is in draft form. There are missing circuit diagrams, images, videos, and other content.
In the last lesson, you established a wireless serial connection between the ESP32 and your computer using Bluetooth Classic’s Serial Port Profile (SPP). You verified the wireless link with terminal tools and Python, but we weren’t yet sending real sensor data.
In this lesson, we’ll add a potentiometer to the circuit, stream live sensor readings over Bluetooth, and visualize them three different ways: in Python, in a hosted SerialTest web app that needs no install, and in our familiar p5.js sketches via Web Serial and the serial.js library—the same tools from the Communication module, but now wireless. Finally, we’ll close the loop with a bidirectional color mixer: a browser hue picker controls a NeoPixel’s color while the pot on the breadboard controls its brightness, with the browser UI staying in sync over the wireless link.
In this lesson, you will learn:
- How to stream live analog sensor data over Bluetooth and visualize it in Python
- How to use our serial.js library—and a hosted Web Serial test app—to inspect Bluetooth data in the browser with zero setup
- How to reuse existing p5.js + Web Serial sketches over a Bluetooth port without changing a single line of code
- How to design a bidirectional interaction where each end of the wireless link owns a different part of the shared state
- How to handle connection drops gracefully on both the ESP32 and the computer
- When to choose Bluetooth Classic vs. BLE for your own projects
Prerequisites: This lesson builds directly on Lesson 2: Bluetooth Serial. You should have already paired your ESP32 with your computer and verified the connection works. The platform requirements from L2 still apply: you’ll need an ESP32 with Bluetooth Classic (e.g., the original Huzzah32 or the Adafruit ESP32 Feather V2). The ESP32-S3 doesn’t support Bluetooth Classic. iPhone users: phone-based activities in this lesson are Android-only; see Lesson 4: BLE for a phone-friendly alternative. See L2’s Two Important Notes Before We Build for the full context.
Materials
In addition to the materials from Lesson 2, you’ll need:
| Breadboard | ESP32 | Potentiometer | NeoPixel |
|---|---|---|---|
 | 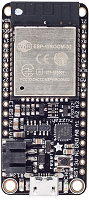 | 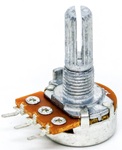 |  |
| Breadboard | ESP32 with BT Classic (see below) | 10kΩ Potentiometer | NeoPixel (onboard or external) |
Choose one ESP32 board with Bluetooth Classic:
- Adafruit ESP32 Feather V2 (product page) — recommended. Has an onboard NeoPixel, so no extra wiring is needed for Part 5.
- Adafruit Huzzah32 ESP32 Feather (product page) — also works. For Part 5 you’ll need an external NeoPixel (see below).
- Other original-ESP32 dev boards (SparkFun ESP32 Thing, Espressif ESP32-DevKitC, etc.) also work; check that the board has Bluetooth Classic (the ESP32-S3, S2, C3, and C6 do not).
NeoPixel options for Part 5:
- If your board has an onboard NeoPixel (Feather V2), you’re done—no extra parts.
- Otherwise, use any external WS2812B/SK6812 addressable LED: the 8-LED stick in our course kits is perfect. You can also use a single NeoPixel, a strip, a ring, or a matrix—the code is the same, only the LED count changes. See the Addressable LEDs lesson for background on the hardware and wiring conventions.
You will also need:
- Google Chrome or Microsoft Edge (for the Web Serial activities in Parts 3–5)—same browser requirement as the Web Serial lesson
- pySerial in a virtual environment, set up in Lesson 2, Part 2
Part 1: Streaming sensor data
Let’s start by streaming live sensor data wirelessly. We’ll read a potentiometer and send its value over Bluetooth, then visualize it in Python.
The circuit
Connect a 10kΩ potentiometer to the ESP32 on pin A7 (GPIO 32), which is an ADC1 pin. (On the original ESP32, ADC2 pins conflict with both WiFi and Bluetooth Classic, so always use ADC1 pins for analog input when using wireless features.)
The Arduino code
The full source is available in our Arduino GitHub repo.
#include "BluetoothSerial.h"

BluetoothSerial SerialBT;

const int POT_INPUT_PIN = A7;           // GPIO 32, an ADC1 pin
const int LED_PIN = LED_BUILTIN;        // built-in LED; aliased for clarity
const int ADC_MAX = 4095;               // ESP32 ADC is 12-bit (0..4095)
const int PWM_MAX = 255;                // analogWrite() expects 0..255 by default
const bool MIRROR_DATA_TO_USB = false;  // if true, also send data over USB Serial

void setup() {
  Serial.begin(115200);
  SerialBT.begin("ESP32-PotSensor");
  Serial.println("Bluetooth started! Pair with 'ESP32-PotSensor' to see live data.");
  Serial.println("The built-in LED brightness tracks the pot position.\n");
}

void loop() {
  int potVal = analogRead(POT_INPUT_PIN);   // 0..4095 (12-bit ADC on ESP32)

  // Normalize to 0.0–1.0 before sending
  float normalized = potVal / (float)ADC_MAX;

  // Drive the built-in LED. analogWrite on the ESP32 wraps LEDC and expects 0..255.
  int brightness = (int)(normalized * PWM_MAX);
  analogWrite(LED_PIN, brightness);

  // Track Bluetooth connection state changes and report them over USB Serial.
  static bool wasConnected = false;
  bool isConnected = SerialBT.connected();
  if (isConnected != wasConnected) {
    Serial.println(isConnected ? "[BT] Client connected." : "[BT] Client disconnected.");
    wasConnected = isConnected;
  }

  // Send the normalized value over Bluetooth — but only if a client is paired
  if (isConnected) {
    SerialBT.println(normalized, 4);
  }

  // Also send data via USB serial for debugging
  if(MIRROR_DATA_TO_USB){
    Serial.println(normalized, 4);
  }
}
Pairing reminder: Since this sketch uses a new device name (
ESP32-PotSensor), you’ll need to pair it from your computer’s Bluetooth settings the first time. See Lesson 2: Pairing with your computer for instructions.
Reading the data in Python
You already have two Python visualization scripts from the Communication module that work perfectly here without any code changes—they expect float values in the range 0.0–1.0, which is exactly what BluetoothPot.ino sends.
Reminder: activate your venv first. The scripts below assume you’ve activated the virtual environment you set up in Lesson 2, Part 2. Each time you open a new terminal:
# macOS / Linux
source venv/bin/activate
# Windows
venv\Scripts\activate
You’ll see
(venv)at the start of your prompt when it’s active. Without it, the scripts will fail withModuleNotFoundError: No module named 'serial'.
Terminal bar graph: serial_bar_graph.py reads a float value per line (0.0–1.0) and renders a live ASCII bar chart in the terminal. To use it over Bluetooth, just pass the Bluetooth port as an argument:
# macOS / Linux — with your venv active
python3 serial_bar_graph.py /dev/tty.ESP32-PotSensor 115200

# Windows — with your venv active
python3 serial_bar_graph.py COM8 115200
Matplotlib circle: serial_draw_circle.py reads a float value per line and draws a circle whose radius is proportional to the value. Same idea—just pass the Bluetooth port:
# macOS / Linux — with your venv active
python3 serial_draw_circle.py /dev/tty.ESP32-PotSensor 115200

# Windows — with your venv active
python3 serial_draw_circle.py COM8 115200
Turn the potentiometer—you’ll see the bar chart or circle updating in real time, with data arriving wirelessly. Compare this with the wired experience: same visualization, no cable. You may notice a slight delay compared to USB serial—Bluetooth Classic SPP typically adds 10–30ms of latency per packet, which is usually imperceptible for human-paced interaction but can matter for high-speed control loops.
These Python scripts were written for USB serial. They work over Bluetooth with no code changes—only the port argument differs. This is SPP’s core value: your computer’s operating system makes the Bluetooth connection look like a regular serial port.
Workbench demo
Part 2: Re-introducing serial.js
So far we’ve sent data from the ESP32 to a Python script. Now let’s bring the same data stream into the browser. Because your computer’s Bluetooth serial port looks just like a USB serial port (that’s SPP’s whole job), the Web Serial API works with it—and so does our serial.js wrapper library from the Communication module. Every method and event you learned in the Web Serial lesson works wirelessly without modification. The only thing that changes is which port you select when you click “Connect.”
Before we dive back in, here’s a quick reference table for serial.js. (We covered this in detail in the Web Serial lesson—revisit that if anything feels rusty.)
serial.js API reference
| Category | API | Purpose |
|---|---|---|
| Setup | new Serial() | Create a Serial instance |
| Setup | Serial.isWebSerialSupported() | Static; returns true if the browser supports Web Serial |
| Events | serial.on(SerialEvents.X, callback) | Subscribe to an event |
| Events | SerialEvents.CONNECTION_OPENED | Port opened successfully |
| Events | SerialEvents.CONNECTION_CLOSED | Port closed (manual or dropped) |
| Events | SerialEvents.DATA_RECEIVED | A full line arrived; callback receives (sender, line) |
| Events | SerialEvents.ERROR_OCCURRED | I/O or connection error; callback receives (sender, error) |
| Connect | await serial.connectAndOpen(filters, options) | Prompts user for a port; must be called from a user gesture (e.g., a button click) |
| Connect | await serial.autoConnectAndOpenPreviouslyApprovedPort(options) | Silent reconnect to a port the user previously approved |
| Connect | await serial.close() | Close the port |
| Write | await serial.writeLine(text) | Send text followed by a newline (\n) |
| Write | await serial.write(text) | Send raw text (no newline) |
| State | serial.isOpen() | Boolean; is the port currently open? |
| State | serial.state | One of SerialState.CLOSED, OPENING, OPEN, CLOSING |
To load the library, add this script tag to your HTML (we already use this pattern in the Communication module’s p5.js sketches):
<script src="https://cdn.jsdelivr.net/gh/makeabilitylab/js@main/dist/makelab.serial.iife.min.js"></script>
After it loads, the Serial, SerialEvents, and SerialState symbols are available as globals—no import statements needed.
Baud rate is ignored over Bluetooth SPP. When you open a USB serial port, the baud rate sets the actual UART speed and must match what the Arduino called
Serial.begin()with—otherwise you get garbled data. Bluetooth SPP has no UART: data travels over the radio link in packets, and the OS handles the framing for you. Chrome’s port dialog andserial.jsstill ask for a baud rate (because they treat all serial ports uniformly), but for a Bluetooth port the value has no effect. Pick anything. We suggest matching the Arduino’s USBSerial.begin(115200)value just to keep one number in your head.
Part 3: SerialTest — no install, no setup, just open and connect
Before we wire up a p5.js sketch, let’s verify the wireless link with the simplest possible browser tool: a hosted version of the Makeability Lab SerialTest app. SerialTest is a small, generic Web Serial console: it has a Connect button, a baud-rate dropdown, a live log of received lines, and a text field for sending. No Node, no Live Server, no clone—just open the URL.
Try it now:
- With the
BluetoothPot.inosketch from Part 1 running on your ESP32, open makeabilitylab.github.io/js/src/apps/serial/SerialTest in Chrome or Edge. - Leave the baud rate set to whatever (remember: it’s ignored for SPP). Click Connect.
- In Chrome’s port-picker dialog, select the Bluetooth port for
ESP32-PotSensor(not the USB port). On macOS this looks like/dev/tty.ESP32-PotSensor; on Windows it’s aCOMport labeled with the Bluetooth device name. - The “Received” pane should immediately start filling with floats between 0 and 1. Turn the pot and watch the numbers update.
- Type something into the Send field and click Send. Nothing will happen on the ESP32 (the Part 1 sketch doesn’t read incoming data yet), but the data is going over the wireless link. We’ll wire up the receive side in Part 5.
This is the same SerialTest you used over USB in the Communication module—the only difference is which port you select. If this works, you have a confirmed wireless serial link and everything else in this lesson will work too.
Why pick the Bluetooth port specifically when both are listed? When your ESP32 is plugged into USB and paired over Bluetooth, Chrome shows both serial ports in the picker. Either one works for receiving data (the Arduino sends to both with
Serial.printlnandSerialBT.println). For the rest of this lesson, always pick the Bluetooth port—that’s the whole point of the wireless link, and it’s how we’ll verify Part 5 works without a USB cable.
Workbench demo
Part 4: Live visualization with p5.js
SerialTest is a useful raw-data console, but our p5.js sketches turn the same stream into something more interesting. Crucially, every p5.js sketch from the Communication module works over Bluetooth without code changes—because serial.js doesn’t know or care whether it’s connected to USB or Bluetooth.
Open either of these existing sketches in the p5.js Web Editor:
- p5.js Circle Visualization with Web Serial — circle size and color follow the pot
- p5.js Sensor Graph with Web Serial — scrolling time-series plot
Run either sketch, click Connect, and pick the ESP32-PotSensor Bluetooth port. Turn the pot. The visualization responds wirelessly. The code is the same code from the p5.js Serial lesson—same serial.js import, same event callbacks, same connectAndOpen() call. The only difference is which port you select in the browser’s picker.
This is the entire point of SPP: existing Web Serial code works wirelessly without modification.
Workbench demo
Part 5: Bidirectional control — wireless color mixer
Up to this point we’ve only sent data from the ESP32 to the computer. Now let’s close the loop and send data both directions—and design a small interaction where each end of the wireless link owns a different part of the shared state. That’s where bidirectional control gets interesting: if the browser already had a slider for everything, the physical knob would be pointless. We need to give the knob a job that the browser can’t do.
The design: split ownership by affordance
Hue is a visual choice—you want to see the colors you’re picking from, so a color picker on a screen is the right tool. Brightness is an amount—a quantity along a single axis—and a rotary knob feels exactly right for that, the way a volume knob feels right on a stereo. So we split the responsibilities:
- The browser owns the hue (0–360°). The user picks a color from a hue wheel.
- The ESP32 owns the brightness (0.0–1.0). The user turns the potentiometer.
- A NeoPixel renders the combined color.
This forces the wireless link to carry data in both directions: the browser must send its hue to the ESP32, and the ESP32 must report its brightness back so the browser’s UI can show the actual color being displayed (a deep red at 30% brightness looks very different from the same deep red at full brightness). Without bidirectional communication, the browser’s color preview would be a lie.
The circuit
Keep the pot from Part 1 on A7. For the NeoPixel, you have two paths:
Path A (recommended): board with an onboard NeoPixel — e.g., the Adafruit ESP32 Feather V2. The NeoPixel is already wired internally to PIN_NEOPIXEL (GPIO 0). No extra wiring needed.
Path B: external NeoPixel — e.g., the 8-LED WS2812B/SK6812 stick in our course kits, or any single NeoPixel, ring, or strip. Wire it to the ESP32:
- Data line → GPIO 27
- VCC → USB pin (5V from USB) for sticks/strips, or 3V for a single NeoPixel
- GND → GND
See the Addressable LEDs lesson for more on power, signal levels, and wiring conventions.
The Arduino code: BluetoothColorMixer
The full source is in our Arduino GitHub repo. The sketch handles both paths above—if your board defines PIN_NEOPIXEL, it uses the onboard pixel; otherwise it falls back to an external pixel on GPIO 27. You’ll need the Adafruit NeoPixel library installed (Sketch → Include Library → Manage Libraries → “Adafruit NeoPixel”).
#include "BluetoothSerial.h"
#include <Adafruit_NeoPixel.h>

#if !defined(CONFIG_BT_ENABLED) || !defined(CONFIG_BLUEDROID_ENABLED)
#error Bluetooth Classic is not enabled. This sketch requires the original ESP32 chip family.
#endif

#if !defined(CONFIG_BT_SPP_ENABLED)
#error Serial Bluetooth (SPP) is unavailable on this chip variant.
#endif

// --- NeoPixel configuration ---
// PIN_NEOPIXEL is defined automatically for boards with an onboard NeoPixel
// (e.g. the Adafruit ESP32 Feather V2). Otherwise, wire an external NeoPixel
// to GPIO 27.
#ifdef PIN_NEOPIXEL
  const int NEOPIXEL_PIN = PIN_NEOPIXEL;
  const int NUM_PIXELS   = 1;
  #ifdef NEOPIXEL_I2C_POWER
    const int NEOPIXEL_POWER_PIN = NEOPIXEL_I2C_POWER;
    #define HAS_NEOPIXEL_POWER_PIN
  #endif
#else
  const int NEOPIXEL_PIN = 27;   // external NeoPixel data line
  const int NUM_PIXELS   = 8;    // 8-LED stick from the kit
#endif

const int POT_INPUT_PIN = A7;
const int ADC_MAX = 4095;
const unsigned long BRIGHTNESS_SEND_INTERVAL_MS = 50;
const float SMOOTHING_ALPHA = 0.15f;  // exponential moving average; lower = smoother
const float BRIGHTNESS_CHANGE_THRESHOLD = 0.005f;  // ~20 LSB on a 12-bit ADC

BluetoothSerial SerialBT;
Adafruit_NeoPixel pixels(NUM_PIXELS, NEOPIXEL_PIN, NEO_GRB + NEO_KHZ800);

int   _hueDegrees = 0;            // browser-owned
float _valueNormalized = 0.0f;    // pot-owned, smoothed
float _lastSentBrightness = -1.0f;  // sentinel: forces first send after (re)connect
unsigned long _lastBrightnessSendMs = 0;

void setup() {
  Serial.begin(115200);

  #ifdef HAS_NEOPIXEL_POWER_PIN
    pinMode(NEOPIXEL_POWER_PIN, OUTPUT);
    digitalWrite(NEOPIXEL_POWER_PIN, HIGH);  // V2: enable onboard NeoPixel power
  #endif

  pixels.begin();
  pixels.clear();
  pixels.show();

  SerialBT.begin("ESP32-ColorMixer");
  Serial.println("Bluetooth started! Pair with 'ESP32-ColorMixer'.");
}

void loop() {
  // 1. Read pot → smoothed brightness
  int potRaw = analogRead(POT_INPUT_PIN);
  float potNorm = potRaw / (float)ADC_MAX;
  _valueNormalized = SMOOTHING_ALPHA * potNorm
                   + (1.0f - SMOOTHING_ALPHA) * _valueNormalized;

  // 2. Receive hue updates from the browser
  if (SerialBT.available()) {
    String line = SerialBT.readStringUntil('\n');
    line.trim();
    if (line.length() > 0) {
      _hueDegrees = constrain(line.toInt(), 0, 360);
    }
  }

  // 3. Render the NeoPixel(s) with hue × brightness
  uint16_t hue16 = map(_hueDegrees, 0, 360, 0, 65535);
  uint8_t  val8  = (uint8_t)(_valueNormalized * 255.0f);
  uint32_t color = pixels.gamma32(pixels.ColorHSV(hue16, 255, val8));
  for (int i = 0; i < NUM_PIXELS; i++) {
    pixels.setPixelColor(i, color);
  }
  pixels.show();

  // 4. Stream brightness back to the browser — throttled AND only on change.
  //    When the pot is sitting still, the wireless link stays idle.
  unsigned long now = millis();
  bool isConnected = SerialBT.connected();
  if (!isConnected) {
    _lastSentBrightness = -1.0f;  // reset sentinel; next reconnect re-sends
  } else if (now - _lastBrightnessSendMs >= BRIGHTNESS_SEND_INTERVAL_MS) {
    if (fabsf(_valueNormalized - _lastSentBrightness) >= BRIGHTNESS_CHANGE_THRESHOLD) {
      _lastBrightnessSendMs = now;
      _lastSentBrightness = _valueNormalized;
      SerialBT.println(_valueNormalized, 4);  // e.g. "0.7321\n"
    }
  }
}
A few notes on the design:
- The wire protocol is asymmetric. Outgoing (browser → ESP32) lines are integers (
180\n). Incoming (ESP32 → browser) lines are floats (0.7321\n). Each direction carries only what that side owns. This is simpler than a single symmetric format like"h, v\n"and makes the ownership pattern explicit in the protocol. - The pot value is smoothed. ESP32 ADCs are noisy (the bottom ~3 bits jitter under normal conditions). A one-line exponential moving average gives the brightness bar a calmer feel without adding perceptible lag.
- Brightness is only sent on change. We throttle to 20 Hz max and suppress sends entirely when the smoothed value hasn’t moved by at least 0.005 (≈ 20 LSB on a 12-bit ADC). When the pot is sitting still, the wireless link is idle—no wasted bandwidth, no spurious browser updates. A sentinel value of
-1for_lastSentBrightnessguarantees a fresh send on every reconnect.
Pairing reminder: This sketch uses a new device name (
ESP32-ColorMixer), so pair it from your computer’s Bluetooth settings the first time. The Part 1ESP32-PotSensorpairing is independent—you can keep both paired simultaneously, but only one can be connected at a time.
The browser side: SerialHueBrightnessTest
We’ve built a small companion web app called SerialHueBrightnessTest, hosted on GitHub Pages. Like SerialTest in Part 3, it needs no install—just open the link.
The interface has two parts:
- A hue wheel (and a backup linear slider) for picking hue. This is the browser-owned state; whatever you select gets sent to the ESP32.
- A brightness bar that’s read-only. This is the device-owned state; it fills up and empties as you turn the pot.
The color swatch shows hue × brightness combined—so when the pot is near zero, the swatch goes dark, even if you’ve chosen a bright hue. The serial-format box at the bottom of the page shows the exact bytes flowing in each direction in real time, which is useful for debugging your own sketches later.
To run it:
- Make sure
BluetoothColorMixer.inois running on your ESP32 and you’ve paired withESP32-ColorMixer. - Open makeabilitylab.github.io/js/src/apps/serial/SerialHueBrightnessTest in Chrome or Edge.
- Click Connect and pick the
ESP32-ColorMixerBluetooth port. - Drag around the hue wheel—the NeoPixel changes color. Turn the pot—the NeoPixel changes brightness and the on-screen brightness bar follows.
Neither side can do this alone. The browser doesn’t know how bright the LED is until the pot tells it. The ESP32 doesn’t know what color to render until the browser tells it. Each side fills in what the other can’t see.
The source for the page is in our JS GitHub repo—it’s a small fork of SerialHueTest with the incoming-data parser changed from “hue” to “brightness,” and a read-only brightness bar added below the hue slider. Worth a read if you’re curious how the receive side works in practice.
Workbench demo
What happens when the connection drops?
If you carry your laptop out of Bluetooth range (or the ESP32 loses power), the connection will drop. The BluetoothSerial library handles this gracefully on the ESP32 side—it will automatically start advertising again, so you can reconnect by re-opening the serial port from your computer. On the browser side, serial.js fires its CONNECTION_CLOSED event; in SerialHueBrightnessTest you’ll see the brightness readout reset to — because we no longer know what the device is doing. If you need to detect the connection state inside the Arduino sketch, use SerialBT.connected() (we use this in the throttled-send block above) or register a callback with SerialBT.register_callback() for explicit connect/disconnect events.
Part 6: Android phone (optional bonus)
If you have an Android phone, you can use the same Part 1 sketch (BluetoothPot.ino) to receive live pot data on your phone—no laptop needed.
iPhone users: You cannot use Bluetooth Classic SPP from an iPhone. In Lesson 4: BLE, we’ll use a protocol that works with both iOS and Android.
Make sure the Part 1 BluetoothPot.ino sketch is running on your ESP32, then:
- On your Android phone, install the free Serial Bluetooth Terminal app by Kai Morich (you may already have it from Lesson 2, Part 3).
- Go to Settings → Bluetooth and pair with
ESP32-PotSensor. - Open the Serial Bluetooth Terminal app → Devices → select your ESP32 → Connect.
- You should see floating-point pot values (0.0000–1.0000) streaming. Turn the pot and watch the stream update.
This is a one-way demo (ESP32 → phone), which is enough to show the wireless link working from a pocket-sized device. For sending data the other direction from Android, see Exercise 5 below.
Gotchas and limitations
One connection at a time. SPP is point-to-point. Only one device (your computer or your phone) can connect to the ESP32’s Bluetooth serial at a time.
No iOS support. Apple blocks Bluetooth Classic SPP for third-party apps. iPhone users can participate fully in the computer-based activities (Parts 1–5) but cannot connect from their phones.
No ESP32-S3. Only the original ESP32 chip family supports Bluetooth Classic. The ESP32-S3, S2, C3, and C6 do not have the hardware.
Range and interference. Expect reliable communication within about 5–10 meters indoors. Walls, furniture, and other 2.4 GHz devices (WiFi, microwaves) reduce range.
macOS Bluetooth port naming. The virtual serial port name varies across macOS versions and can be long or cryptic. Use ls /dev/tty.*Bluetooth* or ls /dev/tty.*ESP* to find it. If the port disappears, unpair and re-pair the device.
Memory usage. Bluetooth Classic consumes significant RAM. If you also need WiFi, consider using BLE instead—or be prepared for potential instability in complex sketches on the original ESP32’s 520KB SRAM.
When to use Bluetooth Classic vs. BLE
You’ve now seen what Bluetooth Classic can do—the next two lessons cover Bluetooth Low Energy (BLE). Before moving on, here’s a quick guide for choosing between them in your own projects:
Use Bluetooth Classic SPP when:
- You want the simplest possible wireless serial—your existing serial code works unchanged
- You’re working entirely from a computer (Mac or Windows)
- You’re using an original-family ESP32 (Huzzah32, Feather V2)
- You don’t need iPhone support
Use BLE (Lesson 4) when:
- You’re using the ESP32-S3 (or any non-original ESP32)
- You need iPhone / iOS compatibility
- You want to connect from a phone app that works on both platforms
- Power efficiency matters (battery-powered projects)
- You want to build a Web Bluetooth web app
Exercises
Exercise 1: Multi-sensor dashboard. Modify the Arduino code to send comma-separated values from two sensors (potentiometer + photoresistor). Update a p5.js sketch to parse the CSV and visualize both streams—one as circle size, one as background color. This is the same parsing pattern from p5.js Serial I/O.
Exercise 2: Compare wired vs. wireless. Open Arduino’s Serial Plotter on the USB port while simultaneously running the Python sensor reader on the Bluetooth port. Both show the same data—one wired, one wireless. Can you measure any latency difference? Try it with delay(10) vs. delay(100) in the Arduino sketch.
Exercise 3: Move brightness ownership to the browser. Take the BluetoothColorMixer sketch and make brightness browser-owned too: add a brightness slider to a fork of SerialHueBrightnessTest, change the wire format so the browser sends "h, v\n", and have the Arduino just render whatever the browser sends. Then ask yourself: what was the pot for? This is the design choice we were avoiding in Part 5—do you prefer it?
Exercise 4: LED brightness from Android. Write a stripped-down version of BluetoothColorMixer that uses a plain LED (with a 220Ω resistor) on GPIO 21 instead of a NeoPixel, and accepts a single integer (0–255) as the brightness command. Pair the Android Serial Bluetooth Terminal app with your ESP32, configure custom buttons (under Settings → Buttons) that send 0, 128, and 255, and you’ve made a phone-based wireless dimmer. (This is roughly what an earlier version of this lesson did with the full p5.js bidirectional demo—it’s a nice minimal Android-friendly variant.)
Exercise 5: Chat between two ESP32s. Flash one ESP32 with the SerialToSerialBT example (peripheral) and another with SerialToSerialBTM (central). Build a two-way text chat.
Exercise 6: Range test. With the Part 1 streaming sketch running, carry your laptop away from the ESP32. At what distance does the data start dropping out? When does the connection drop entirely? Test with and without walls between you and the ESP32.
Exercise 7: Replicate a Communication module project. Pick any project from the Communication module (the paint app, the shape drawer, etc.) and run it over Bluetooth instead of USB. How much code did you have to change? (The answer should be: none—just a different port selection.)
Lesson Summary
In this lesson, you went beyond Hello World to build real interactive Bluetooth projects:
- Streaming sensor data over Bluetooth uses
SerialBT.println()—the same pattern as USB serial, just wireless. Always use ADC1 pins (like A7) on the ESP32 when WiFi or Bluetooth are active. - The serial.js library works unchanged over Bluetooth. Web Serial doesn’t know or care which transport is underneath, so every method (
connectAndOpen,writeLine, event subscriptions) behaves exactly the same. The only thing that changes is which port you select in Chrome’s picker. - Baud rate has no effect over SPP—there’s no UART, just a radio link with OS-managed packetization. Set it to anything.
- Hosted browser tools (
SerialTest,SerialHueBrightnessTest) let students verify wireless links without any local setup. Open the page, click Connect, pick the Bluetooth port. - Bidirectional control is most interesting when each side owns a different part of the state. Our color mixer hands hue to the browser (a screen task) and brightness to the pot (a knob task), and the wireless link carries each piece in its own direction.
- Connection drops are handled gracefully: the ESP32 re-advertises automatically,
pySerialraisesSerialException, andserial.jsfiresCONNECTION_CLOSED. - Bluetooth Classic SPP has a practical range of 5–10 meters indoors, supports one connection at a time, and adds 10–30ms of latency compared to USB.
- For most new projects—especially on the ESP32-S3—BLE is the better default. But Bluetooth Classic SPP is unbeatable when you want existing serial code to work wirelessly without modification.
Resources
- BluetoothSerial library source and examples — official library in the ESP32 Arduino core
- Adafruit NeoPixel library — the library used in
BluetoothColorMixerfor driving the LED - Makeability Lab JS Library (serial.js) — Web Serial wrapper, lives in the same repo as
SerialTestandSerialHueBrightnessTest - SerialTest — hosted generic Web Serial console
- SerialHueBrightnessTest — hosted bidirectional color-mixer companion to this lesson
- BluetoothColorMixer.ino — the Part 5 Arduino sketch
- Web Serial lesson — our introduction to Web Serial (the same API that works with Bluetooth COM ports)
- p5.js Serial and p5.js Serial I/O — the Communication module foundations this lesson builds on
- Addressable LEDs lesson — background on NeoPixel hardware and wiring
- Serial Bluetooth Terminal — recommended Android app for Bluetooth serial (free, by Kai Morich)
Next Lesson
In the next lesson, we’ll learn Bluetooth Low Energy (BLE)—the protocol that powers fitness trackers, smart home devices, and billions of IoT sensors. BLE works on the ESP32-S3, works with iPhones and Android phones, and introduces a structured data model that’s more powerful than serial. The code is more complex, but the capabilities—and the universal device compatibility—are worth it. Let’s go! 🚀