Lesson 2: Bluetooth Serial
Table of Contents
- What is Bluetooth?
- Is Bluetooth Classic Still Used?
- The Serial Port Profile (SPP)
- Two Important Notes Before We Build
- Materials
- Part 1: Hello Bluetooth
- Part 2: Connecting with Python
- Part 3: Android phone (optional bonus)
- Troubleshooting Bluetooth connections
- Lesson Summary
- Resources
- Next Lesson
This lesson is in draft form. There are missing circuit diagrams, images, videos, and other content.
In the last lesson, you transmitted sensor data through WiFi, across the internet, and up to a cloud dashboard. But what if you just want to communicate with the laptop sitting right in front of you—without a USB cable? What if you could run the same Python scripts and terminal tools from the Communication module, but wirelessly?
In this lesson, we’ll do exactly that using Bluetooth. And here’s the fun part: the code on your computer is going to be identical. Bluetooth Classic’s Serial Port Profile (SPP) creates a virtual serial port on your computer that looks and behaves exactly like a tethered USB serial connection. Your Python scripts, your terminal commands, your p5.js programs—they all work unchanged. The only difference is which port you select. ✨
In this lesson, you will learn:
- What Bluetooth is, its origin story, and why there are two very different flavors: Bluetooth Classic and Bluetooth Low Energy (BLE)
- How the Serial Port Profile (SPP) creates a virtual serial port on your computer—making Bluetooth look exactly like a USB serial connection
- How to use the
BluetoothSeriallibrary and why its API intentionally mirrors Arduino’s built-inSerial- How to pair the ESP32 with your Mac or Windows computer and find the Bluetooth serial port
- How to verify the connection using built-in OS tools (
cat,screen, PowerShell)—no Python required- How to use Python and pySerial to communicate with the ESP32 over Bluetooth—using the same code patterns from the Intro to Serial Communication lesson
- How to troubleshoot common Bluetooth Classic issues on macOS and Windows
- Why Bluetooth Classic does not work on the ESP32-S3 and does not work with iPhones
In the next lesson, we’ll build on this foundation to stream live sensor data and create interactive p5.js visualizations over Bluetooth using Web Serial.
What is Bluetooth?
Bluetooth is a short-range wireless communication standard for exchanging data between devices over radio waves. It operates in the 2.4 GHz ISM band (the same frequency range as WiFi and your microwave oven) and is designed for low-power, close-range connections—typically within about 10 meters indoors.
A brief history
Bluetooth was developed in the 1990s by Ericsson as a wireless replacement for RS-232 serial cables (the same serial communication we studied in Lesson 1 of the Communication module!). The name comes from Harald Bluetooth, a 10th-century Danish king who united warring Scandinavian tribes—a fitting metaphor for a technology designed to unite different devices. The Bluetooth logo is a bind rune merging Harald’s initials in a runic alphabet called Younger Futhark: ᚼ (Hagall, “H”) and ᛒ (Bjarkan, “B”).
Two flavors: Classic and Low Energy
When people say “Bluetooth,” they might mean one of two fundamentally different protocols that happen to share a name:
-
Bluetooth Classic (also called BR/EDR, for “Basic Rate / Enhanced Data Rate”) is the original Bluetooth. It was designed for continuous data streaming—wireless headphones, file transfers, or serial port emulation. It establishes a persistent connection and can push data at up to 3 Mbps at the radio level, though practical throughput for the Serial Port Profile is much lower (typically a few hundred kbps). This is the flavor we’ll use in this lesson.
-
Bluetooth Low Energy (BLE, introduced in Bluetooth 4.0 in 2010) is a completely different protocol stack designed for low-power, intermittent data exchange—fitness trackers that run for months on a coin cell, sensors broadcasting a reading every few seconds. We’ll cover BLE in Lesson 4.
Despite sharing the “Bluetooth” name, Classic and BLE are not compatible with each other. A BLE-only device cannot talk to a Bluetooth Classic device and vice versa. The original ESP32 supports both; the ESP32-S3 supports BLE only.
| Feature | Bluetooth Classic (BR/EDR) | Bluetooth Low Energy (BLE) |
|---|---|---|
| Introduced | Bluetooth 1.0 (1999) | Bluetooth 4.0 (2010) |
| Design goal | Continuous streaming | Intermittent, low-power data |
| Data throughput | Up to 3 Mbps | ~1 Mbps (typically much less) |
| Power consumption | Higher | Very low (coin cell battery for months) |
| Connection model | Persistent stream (like serial) | Structured reads/writes/notifications |
| Range | ~10–30m (Class 2) | ~10–30m (similar) |
| Audio streaming | Yes (A2DP, HFP profiles) | Not originally (LE Audio added in BT 5.2) |
| iOS app support | No (Apple blocks SPP for third-party apps) | Yes |
| ESP32 (original) | ✅ | ✅ |
| ESP32-S3 | ❌ | ✅ |
| ESP32-S2 | ❌ (no Bluetooth at all) | ❌ (no Bluetooth at all) |
| ESP32-C3, C6 | ❌ | ✅ |
Table. Comparison of Bluetooth Classic and Bluetooth Low Energy. The original ESP32 supports both, but the ESP32-S3 only supports BLE.
Is Bluetooth Classic Still Used?
Yes! Despite being over two decades old, Bluetooth Classic remains the dominant wireless audio protocol today. Every pair of wireless headphones you’ve likely used—Apple AirPods, Sony WH-1000XM series, Bose QuietComfort, JBL speakers—streams music over A2DP, a Bluetooth Classic profile. Moreover, Bluetooth keyboards, mice, and game controllers also typically use Classic’s HID profile. Many modern devices are actually “dual-mode”: AirPods, for example, stream audio over Bluetooth Classic while simultaneously using BLE for Apple’s Find My network and proximity pairing.
That said, Bluetooth Classic’s expected replacement is underway—LE Audio (introduced in Bluetooth 5.2) brings a new, more efficient audio codec (LC3) and features like Auracast broadcast audio, and most new devices now ship as dual-mode during the transition.
Why doesn’t the ESP32-S3 support Bluetooth Classic? Espressif designed the ESP32-S3 for IoT and edge AI workloads where BLE’s low power consumption matters more than Classic’s streaming capabilities. Dropping the Classic radio reduces the hardware die area, power consumption, and cost. If you try to compile a
BluetoothSerialsketch on the ESP32-S3, you’ll get the error:Serial Bluetooth not available or not enabled. It is only available for the ESP32 chip.This is a chip-level limitation, not a software bug.
The Serial Port Profile (SPP)
One very cool and useful aspect of Bluetooth Classic is that we can make it act just like a serial cable, so all of our Serial Communication lessons are relevant. This is done via the Serial Port Profile (SPP), which emulates a wired RS-232 serial port—exactly the kind of serial communication we’ve been doing over USB.
When you pair the ESP32 with your computer over Bluetooth Classic, your operating system creates a virtual serial port—a COM port on Windows (e.g., COM8) or a /dev/tty.* device on macOS (e.g., /dev/tty.ESP32-Bluetooth). This virtual port behaves identically to the USB serial port you’ve been using all along. Any software that can open a serial port—the Arduino Serial Monitor, a Python script with pySerial, a web browser using the Web Serial API, the serial.js library—can communicate over Bluetooth without any code changes. Just select the Bluetooth port instead of the USB port.
This is a key insight of this lesson: Bluetooth Classic SPP is a wireless serial cable. So, everything you learned in the Communication module—data framing, parsing comma-separated values, terminal tools—works unchanged. The only difference is the transport: radio waves instead of copper wire.
How SPP works under the hood (click to expand)
SPP sits on top of several Bluetooth Classic protocol layers. At the bottom, the L2CAP (Logical Link Control and Adaptation Protocol) layer provides connection-oriented data channels over the Bluetooth radio. Above that, RFCOMM (Radio Frequency Communication) emulates RS-232 serial ports over L2CAP—this is the layer that makes Bluetooth look like a wired serial connection. SPP is a profile that defines how RFCOMM should be used for general-purpose serial communication. When your computer pairs with the ESP32, the SDP (Service Discovery Protocol) lets the computer discover that the ESP32 offers an SPP service, and the OS creates a virtual COM port backed by an RFCOMM channel. You don’t need to know any of this to use SPP—the BluetoothSerial library handles it all—but it explains why the abstraction works so seamlessly.
Two Important Notes Before We Build
Two important notes before we get started building:
This lesson requires the original ESP32 (like the Adafruit Huzzah32 or Espressif ESP32-DevKitC V4), not the ESP32-S3. The ESP32-S3 does not have the hardware for Bluetooth Classic—the BluetoothSerial library will not compile on it. If you’re taking one of our classes, you can borrow an ESP32 board from us. If you only have access to an ESP32-S3, skip ahead to Lesson 4: Introduction to BLE, which works with both boards.
Apple iPhones will not work. 😢 Apple does not allow third-party apps to use Bluetooth Classic SPP on iOS, so iPhones cannot connect to the ESP32 over Bluetooth Classic. This lesson is entirely computer-based (Mac and Windows), so your phone type doesn’t matter for Parts 1 and 2. If you have an Android phone, there’s an optional bonus activity in Part 3. In Lesson 4: BLE, we’ll use a protocol that works with everyone’s phone—including iPhones.
Materials
You’ll need the following components. This lesson uses the original ESP32 (in our case, the Adafruit Huzzah32 ESP32 Feather), not the ESP32-S3.
| ESP32 |
|---|
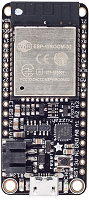 |
| Huzzah32 ESP32 Feather |
You will also need:
- A Mac or Windows computer with Bluetooth (most modern laptops have Bluetooth built in)
- Python 3 with pySerial installed (
pip3 install pyserial)
No external circuit components needed for this lesson! We’ll just use the ESP32 by itself to establish the wireless link. In the next lesson, we’ll add a potentiometer and LED for sensor streaming and bidirectional control.
If you only have an ESP32-S3, you can skip ahead to Lesson 4: Bluetooth Low Energy.
Part 1: Hello Bluetooth
Let’s cut the wire! ✂️🔌
In this first activity, we’ll upload a Bluetooth serial sketch to the ESP32, pair it with your computer, and verify the connection using built-in OS tools—no Python or external dependencies. We’ll just use your OS’s built-in terminal. This way, if anything goes wrong, you’ll know immediately whether it’s a Bluetooth issue or a software issue.
The BluetoothSerial library
The ESP32 Arduino core includes a built-in library called BluetoothSerial that handles all the Bluetooth Classic SPP complexity for you. No library installation is needed—just #include "BluetoothSerial.h" and you’re ready to go.
The library’s API was intentionally designed to mirror Arduino’s built-in Serial class. It provides the same .begin(), .available(), .read(), .write(), .print(), and .println() methods you already know. This means converting a wired serial sketch to Bluetooth is as simple as creating a BluetoothSerial object and using it alongside (or instead of) Serial. The rest of your code stays identical! 🎉
| Method | Serial (USB) | SerialBT (Bluetooth) | Notes |
|---|---|---|---|
| Initialize | Serial.begin(115200) | SerialBT.begin("ESP32-BT") | Serial takes a baud rate; SerialBT takes a device name (baud rate is negotiated by the Bluetooth stack) |
| Check for data | Serial.available() | SerialBT.available() | Identical — returns number of bytes waiting |
| Read a byte | Serial.read() | SerialBT.read() | Identical |
| Read until delimiter | Serial.readStringUntil('\n') | SerialBT.readStringUntil('\n') | Identical |
| Write bytes | Serial.write(buf, len) | SerialBT.write(buf, len) | Identical |
| Print text | Serial.println("hello") | SerialBT.println("hello") | Identical — also .print(), .printf() |
| Check connection | (always connected) | SerialBT.connected() | Returns true if a device is currently paired and connected |
| Connection events | (n/a) | SerialBT.register_callback(cb) | Optional callback for connect/disconnect events — no Serial equivalent |
Table. Key API comparison between Arduino’s built-in Serial and the BluetoothSerial library. Every read/write method is identical — only initialization and connection management differ.
The key difference is in .begin(): while the traditional Serial.begin() takes a baud rate because it configures a physical UART, SerialBT.begin() takes a device name because the Bluetooth stack handles data rates internally. The other difference is that Bluetooth connections can come and go—unlike a USB cable, a Bluetooth device might walk out of range—so BluetoothSerial adds connected() and register_callback() for connection state management. We’ll explore these in the next lesson when we discuss what happens when a connection drops.
Reminder:
BluetoothSerialis only available on the original ESP32 chip. If you try to include it on an ESP32-S3 (or C3, S2, etc.), the sketch will not compile.
The Arduino code
Let’s start with the Arduino code. The following sketch creates a bidirectional bridge between the USB serial connection (to your computer via USB) and a Bluetooth serial connection (to your computer via Bluetooth). Anything sent over Bluetooth arrives on USB serial and vice versa. It also sends a periodic message so you can immediately see that data is flowing. When data is sent or received over Bluetooth, the built-in red LED (pin 13) flashes briefly as a visual heartbeat.
The full source is available in our Arduino GitHub repo.
#include "BluetoothSerial.h"

// LED_BUILTIN is defined by the board package (e.g., pin 13 on the Huzzah32).
// We alias it here so you can easily swap in a different pin if needed.
const int LED_PIN = LED_BUILTIN;
const unsigned long LED_FLASH_MS = 60;  // How long a single flash cycle takes
const unsigned int NUM_FLASHES = 3;

BluetoothSerial SerialBT;

unsigned long _lastMsgMs = 0;
unsigned long _msgCount = 0;
const unsigned long GREETING_INTERVAL_MS = 2000;

void setup() {
  Serial.begin(115200);
  pinMode(LED_PIN, OUTPUT);

  // Initialize Bluetooth with a device name. You can choose any name you
  // like — "ESP32-Bluetooth", "Jon's ESP32", "Pikachu", etc. This is the
  // friendly name that appears when you scan for Bluetooth devices on your
  // computer (pick something recognizable in a classroom full of ESP32s!).
  SerialBT.begin("ESP32-Bluetooth");

  Serial.println("Bluetooth started! You can now pair with 'ESP32-Bluetooth'.");
  Serial.println("Open a Bluetooth serial connection to see messages.");
  Serial.println("Anything you type here will be forwarded over Bluetooth (and vice versa).\n");
}

void loop() {
  // Periodically send message updates
  unsigned long now = millis();
  if (now - _lastMsgMs >= GREETING_INTERVAL_MS) {
    _lastMsgMs = now;
    _msgCount++;

    String msg = "Hello from ESP32! [Msg #" + String(_msgCount)
               + " | Uptime: " + String(now / 1000.0, 1) + "s]";

    // Check if Bluetooth Serial is connected
    if (SerialBT.connected()) {
      // Send Bluetooth message
      SerialBT.println("[Bluetooth] " + msg);
      flashLED();  // Visual confirmation: data sent over Bluetooth
    } else {
      // Send USB Serial message
      Serial.println("[USB Serial] Waiting for Bluetooth connection...");
    }
    Serial.println("[USB Serial] " + msg);
  }

  // Forward everything received from USB Serial (e.g., typed in Serial Monitor)
  // to the Bluetooth peer. We use read()/write() (byte-at-a-time) rather than
  // readStringUntil() because it's non-blocking — the loop keeps running without
  // waiting for a newline or timeout.
  while (Serial.available()) {
    SerialBT.write(Serial.read());
  }

  // Forward everything received over Bluetooth to USB Serial.
  // The outer `if` avoids flashing when there's nothing to read, and
  // ensures we flash once per burst of data rather than once per byte.
  if (SerialBT.available()) {
    while (SerialBT.available()) {
      Serial.write(SerialBT.read());
    }
    flashLED();  // Visual confirmation: data received over Bluetooth
  }
}

/**
 * Briefly flashes the built-in LED. Uses a blocking delay, which is
 * fine for a simple example — the ~180 ms pause won't noticeably affect
 * the 2-second greeting interval or byte-at-a-time forwarding.
 */
void flashLED() {
  for(int i=0; i< NUM_FLASHES; i++){
    digitalWrite(LED_PIN, HIGH);
    delay(LED_FLASH_MS / 2);
    digitalWrite(LED_PIN, LOW);
    delay(LED_FLASH_MS / 2);
  }
}
Notice how the code reads like a standard serial sketch — compare the SerialBT calls with the Serial calls and you’ll see the API mirroring from the table above in action. The one difference is SerialBT.begin("ESP32-Bluetooth"): instead of a baud rate, it takes a device name that will appear when you scan for Bluetooth devices on your computer.
You can choose any name you like—”ESP32-Bluetooth”, “MyPotentiometer”, “Jon’s ESP32”, or even “Chewbacca”. This is the friendly name that will appear in your computer’s or phone’s Bluetooth settings when scanning for nearby devices, so pick something recognizable (especially in a classroom full of ESP32s!).
Upload this sketch to your ESP32 and open Serial Monitor at 115200 baud. You should see greeting messages appearing every 2 seconds, prefixed with [USB Serial]:
[USB Serial] Msg #1 | Uptime: 2.0s
[USB Serial] Msg #2 | Uptime: 4.0s
[USB Serial] Msg #3 | Uptime: 6.0s
This confirms the sketch is running. Now let’s pair and see those messages arrive wirelessly.
What about the flickering orange LED? On the Adafruit Huzzah32, you may notice an orange LED near the USB jack that flickers constantly. This is the CHG (charge) LED. It’s hardwired to the LiPo battery charging circuit and is not controllable in code. It flickers when no battery is connected. You can safely ignore it.
Have an ESP32 with a built-in NeoPixel? If you’re using the Adafruit ESP32 Feather V2 (or have an external NeoPixel wired up), check out HelloBluetoothRGB — it flashes blue for Bluetooth send and green for Bluetooth receive, making it easy to distinguish data direction.
Pairing with your computer
Before you can communicate over Bluetooth, you need to pair your computer with the ESP32. This is a one-time step—once paired, your computer will remember the device.
macOS
- Open System Settings → Bluetooth (or click the Bluetooth icon in the menu bar).
- Make sure Bluetooth is turned on. You should see
"ESP32-Bluetooth"appear in the nearby devices list. - Click Connect next to
"ESP32-Bluetooth". macOS will pair with the device. - Once paired, macOS creates a virtual serial port. To find it, open Terminal and run:
ls /dev/tty.*Bluetooth*
You should see something like /dev/tty.ESP32-Bluetooth or /dev/tty.ESP32-BluetoothSPP. This is your Bluetooth serial port.
Troubleshooting macOS: If the Bluetooth serial port doesn’t appear, try unpairing and re-pairing the device. On some macOS versions, you may need to open Terminal and run
ls /dev/tty.*before and after pairing to identify the new port. The port name varies by macOS version and Bluetooth stack, but it typically contains the device name.
Windows
- Open Settings → Bluetooth & devices (or Settings → Devices → Bluetooth & other devices on Windows 10).
- Click Add device → Bluetooth. Windows will scan for nearby devices.
- Select
"ESP32-Bluetooth"and click Pair. - Once paired, Windows creates a virtual COM port. To find it, open Device Manager (right-click the Start button → Device Manager) and expand Ports (COM & LPT). Look for a
"Standard Serial over Bluetooth link"entry—note its COM port number (e.g.,COM8).
Windows creates two COM ports for each Bluetooth SPP pairing: one for outgoing and one for incoming connections. You want the outgoing port—this is the one that actually initiates the SPP data channel. If one connects but shows no data, try the other. You can check which is which in Control Panel → Devices and Printers → right-click ESP32-Bluetooth → Properties → Services.
Verifying the connection
Now let’s verify that data is actually flowing over Bluetooth. We’ll use built-in OS tools—no Python, no additional installs—so if something goes wrong, you’ll know immediately that it’s a Bluetooth issue, not a software setup issue.
macOS / Linux
Open Terminal and run:
cat /dev/tty.ESP32-Bluetooth
Replace the port name with whatever ls /dev/tty.*Bluetooth* showed you. You should immediately see greetings streaming in:
[Bluetooth] Msg #1 | Uptime: 2.0s
[Bluetooth] Msg #2 | Uptime: 4.0s
[Bluetooth] Msg #3 | Uptime: 6.0s
Press Ctrl+C to stop.
Now try screen, which provides a more interactive serial terminal:
screen /dev/tty.ESP32-Bluetooth 115200
In screen, you can type characters that will be forwarded to the ESP32. To exit screen, press Ctrl+A then K, then confirm with y. On Mac, use the control key — labeled ⌃ — not ⌘ Command.
Windows
If you use Windows, we’ve made a PowerShell script called serial_reader.ps1 that reads from a COM port with zero dependencies.
Download it and run from your PowerShell terminal:
# List available COM ports
.\serial_reader.ps1

# Connect to the Bluetooth COM port
.\serial_reader.ps1 -Port COM16
If you get an execution policy error, run this once first:
Set-ExecutionPolicy -Scope CurrentUser -ExecutionPolicy RemoteSigned
You should see messages streaming in:
Connected! Listening for data...

[Bluetooth] Msg #1 | Uptime: 2.0s
[Bluetooth] Msg #2 | Uptime: 4.0s
[Bluetooth] Msg #3 | Uptime: 6.0s
Press Ctrl+C to stop.
If you see messages, congratulations—you’re communicating wirelessly! 🎉 The ESP32 is sending data over Bluetooth, your computer is receiving it through a virtual serial port, and no USB cable was involved. This is the core magic of SPP.
Only one program can open a serial port at a time. If you have Arduino’s Serial Monitor open on the Bluetooth COM port,
cat/screen/PowerShell won’t be able to connect (and vice versa). Close Serial Monitor before trying the terminal commands—or keep Serial Monitor on the USB port (COM4) and use the terminal on the Bluetooth port. This is the same constraint from the serial introduction, just with two ports to manage.
If you don’t see any data, see the Troubleshooting Bluetooth connections section below before moving on.
Workbench demo of Bluetooth terminal programs
Part 2: Connecting with Python
Now that you’ve verified Bluetooth is working, let’s connect from Python—using the same pySerial library you used in the serial introduction lesson. This is where SPP really shines: your existing Python serial code works over Bluetooth with only a port name change.
Setting up pySerial
If you don’t already have pySerial installed, you’ll need to install it. The recommended approach is to use a virtual environment, which keeps your project’s dependencies isolated from your system Python:
# Create a virtual environment (one-time setup)
python3 -m venv venv

# Activate it
# macOS / Linux:
source venv/bin/activate
# Windows:
venv\Scripts\activate

# Install pySerial
pip install pyserial
Once activated, you’ll see (venv) at the beginning of your terminal prompt. You’ll need to run the activate command each time you open a new terminal window to work on this project.
Why a virtual environment? Modern macOS (via Homebrew) and some Linux distributions block global
pip installcommands to protect system Python (PEP 668). You’ll see anexternally-managed-environmenterror if you trypip install pyserialwithout a venv. A virtual environment solves this cleanly and is good practice for any Python project.
Windows users: Use
pythoninstead ofpython3throughout this lesson. On Windows, thepython3command often triggers a misleading Microsoft Store redirect instead of running Python. On macOS and Linux, eitherpythonorpython3works, butpython3is the safer choice to avoid accidentally invoking Python 2 on older systems.
Reading Bluetooth data with serial_reader.py
We provide a simple Python script called serial_reader.py that connects to a serial port and prints whatever data arrives. It’s the Python equivalent of the cat or PowerShell commands you just used—but now you’re using pySerial, the same library you’ll use for more sophisticated projects.
First, list available ports to find your Bluetooth serial port:
# macOS / Linux
python3 serial_reader.py --list

# Windows
python serial_reader.py --list
On Windows, you should see something like:
Available serial ports:
  COM1 - Communications Port (COM1)
  COM4 - Silicon Labs CP210x USB to UART Bridge (COM4)
  COM16 - Standard Serial over Bluetooth link (COM16)
  COM17 - Standard Serial over Bluetooth link (COM17)
COM4 is your tethered USB serial connection (the CP210x chip on the Huzzah32). COM16 and COM17 are Bluetooth serial ports—Windows creates two for each Bluetooth SPP pairing: one for outgoing and one for incoming connections. You typically want the first one listed, but if it doesn’t work, try the other.
Now connect:
# macOS / Linux
python3 serial_reader.py /dev/tty.ESP32-Bluetooth 115200

# Windows
python serial_reader.py COM16 115200
You should see the same greetings you saw in Part 1:
Connected! Listening for data...

[Bluetooth] Msg #42 | Uptime: 84.0s
[Bluetooth] Msg #43 | Uptime: 86.0s
[Bluetooth] Msg #44 | Uptime: 88.0s
Press Ctrl+C to stop.
The baud rate parameter is ignored for Bluetooth virtual COM ports on most operating systems. SPP negotiates its own data rate at the Bluetooth protocol level, so the
baudrate=115200argument is passed to pySerial for API compatibility but doesn’t actually set a baud rate the way it does for USB serial. You can pass any value and it will work—but we use115200to match ourSerial.begin(115200)for consistency.
Sending data with serial_demo.py
The serial_reader.py script only listens. To test bidirectional communication, use serial_demo.py—the interactive send-and-receive script from the Communication module. It lets you type a number, sends it to the ESP32, and prints the echoed response:
# macOS / Linux
python3 serial_demo.py /dev/tty.ESP32-Bluetooth 115200

# Windows
python serial_demo.py COM16 115200
Type a number and press Enter—it will be sent to the ESP32 over Bluetooth, forwarded to USB Serial Monitor, and you can see it arrive wirelessly. You’re communicating bidirectionally! 🎉
This is the point of SPP. Both
serial_reader.pyandserial_demo.pywere written for USB serial. They work over Bluetooth with only a port name change. The pySerial API, thereadline()calls, thewrite()calls—everything is the same. Your operating system makes Bluetooth look like a wired serial connection.
Workbench demo of Python Bluetooth
Part 3: Android phone (optional bonus)
If you have an Android phone, you can also communicate with the ESP32 using a Bluetooth terminal app—no laptop needed. This is an optional bonus activity since the rest of the lesson is computer-based.
iPhone users: You cannot use Bluetooth Classic SPP from an iPhone. Apple restricts Bluetooth Classic to system-level functions (audio, keyboards, etc.). Don’t worry—in Lesson 4: BLE, we’ll use a protocol that works with both iOS and Android.
- On your Android phone, install the free Serial Bluetooth Terminal app by Kai Morich.
- Go to Settings → Bluetooth and pair with
"ESP32-Bluetooth"(the device name from theHelloBluetoothsketch). - Open the Serial Bluetooth Terminal app → Devices → select
"ESP32-Bluetooth"→ Connect. - You should see the periodic
[Bluetooth] Msg #N | Uptime: ...greetings streaming in—just like in your terminal. Type a message and tap Send; it will be forwarded to the ESP32 and echoed back over USB Serial Monitor.
This is the same SPP magic, but from your phone. The Android app speaks Bluetooth Classic SPP the same way
catand pySerial do—byte stream over a virtual serial channel. We’ll do more interesting things with this in the next lesson once we’ve added a potentiometer and an LED to the circuit.
Troubleshooting Bluetooth connections
Bluetooth Classic SPP is straightforward once it works, but the initial setup can be finicky—especially on Windows. Here are the most common issues and how to resolve them.
General issues
“Only one program can open a serial port at a time.” If Arduino’s Serial Monitor, PuTTY, a Python script, or any other program has the Bluetooth COM port open, nothing else can use it. Close all other serial programs before trying a new one. You can have Serial Monitor open on the USB port (COM4) while using Python on the Bluetooth port (COM16)—they’re separate ports.
“No data, but no error either.” The connection opened successfully but nothing appears. Make sure the Arduino sketch is actually running—check Serial Monitor on the USB port for [USB Serial] messages. If USB Serial is working but Bluetooth isn’t, the issue is on the Bluetooth/OS side, not the Arduino side.
“Bluetooth connection drops frequently.” Bluetooth Classic SPP has a practical range of about 5–10 meters indoors. Walls, furniture, and other 2.4 GHz devices (WiFi routers, microwaves) reduce range and can cause interference. Move closer to the ESP32 and away from other wireless devices.
macOS-specific issues
Port doesn’t appear after pairing. Try unpairing and re-pairing the device. Run ls /dev/tty.* before and after pairing to spot the new port. The port name varies by macOS version but typically contains the device name (e.g., /dev/tty.ESP32-Bluetooth).
externally-managed-environment error when installing pySerial. Modern macOS (via Homebrew) blocks global pip install to protect system Python. Use a virtual environment as described in Part 2. This is the correct fix—avoid using --break-system-packages as it can cause problems with future Homebrew updates.
python3: command not found. Install Python 3 from python.org or via Homebrew (brew install python).
Windows-specific issues
Two COM ports appear. Windows creates two COM ports for each Bluetooth SPP pairing: one for outgoing and one for incoming. You want the outgoing port. If one connects but shows no data, try the other. Check which is which in Control Panel → Devices and Printers → right-click ESP32-Bluetooth → Properties → Services.
COM port hangs when connecting. Some USB Bluetooth adapters—especially those with Realtek chipsets, such as the TP-Link UB500—have driver issues with Bluetooth Classic SPP on Windows. Symptoms include: pairing succeeds, COM ports appear, but the connection hangs or no data flows. If you experience this, try updating your adapter’s drivers from the manufacturer’s website, using your laptop’s built-in Bluetooth adapter instead (if available), or testing with a different Bluetooth adapter.
Isolating adapter issues. If you’re not sure whether the problem is your code or your Bluetooth adapter, use the
serial_reader.ps1PowerShell script—it has zero dependencies and uses Windows’ built-in .NET serial classes. If the PowerShell script also can’t receive data, the problem is your adapter or driver, not your Python code. You can also try PuTTY (Connection type: Serial, your COM port, 115200 baud, Flow control: None) as a third independent test.
python is not recognized / Microsoft Store redirect. On Windows, use python instead of python3. If python isn’t recognized, reinstall Python from python.org and make sure “Add Python to PATH” is checked during installation. You can also disable the Microsoft Store redirect in Settings → Apps → Advanced app settings → App execution aliases by toggling off the python.exe and python3.exe aliases.
ESP32 shows “Not connected” in Bluetooth settings. This is normal for Bluetooth Classic SPP on Windows. The “Connected” status only appears during an active data session, not just from pairing. The device is paired and ready—it will show “Connected” once you open the COM port.
Still stuck?
If the tips above don’t resolve your issue, try describing your problem to an AI assistant like Claude or Gemini. Include the specific error messages you’re seeing, your operating system, your Bluetooth adapter (built-in or external), and what you’ve already tried. These tools are especially helpful for debugging driver issues and platform-specific quirks. You can also ask on the course discussion board—chances are another student has hit the same issue.
Lesson Summary
In this lesson, you cut the wire! Here’s what you learned:
- Bluetooth is a short-range wireless standard with two incompatible flavors: Classic (continuous streaming, what we used here) and Low Energy / BLE (low-power structured data, coming up next).
- The
BluetoothSeriallibrary ships with the ESP32 Arduino core and intentionally mirrors theSerialAPI. Converting wired serial code to Bluetooth requires minimal changes on both the Arduino and computer side. - Bluetooth Classic’s Serial Port Profile (SPP) creates a virtual serial port on your computer that behaves identically to a USB serial port. Any program that can talk to USB serial—Serial Monitor,
cat/screen, PowerShell, pySerial—works unchanged over Bluetooth. Just select the Bluetooth port instead of the USB port. - Pairing the ESP32 with your Mac or Windows computer is a one-time step. macOS creates a
/dev/tty.*device; Windows creates a COM port (in fact, two—you usually want the first). - pySerial connects to the Bluetooth serial port with the same API you already know—only the port name changes.
- Android phones can connect to Bluetooth Classic SPP using a terminal app, but iPhones cannot—Apple blocks SPP for third-party apps.
- Bluetooth Classic only works on the original ESP32, not the ESP32-S3, S2, C3, or C6. This is a hardware-level limitation.
In the next lesson, we’ll build on this foundation: add a potentiometer and LED to the circuit, stream live sensor data, and build interactive p5.js visualizations using Web Serial—all over Bluetooth.
Resources
- BluetoothSerial library source and examples — the official library in the ESP32 Arduino core
- ESP32 Arduino Bluetooth API docs — Espressif’s API reference
- pySerial documentation — the Python serial library used throughout our lessons
- Serial Bluetooth Terminal — our recommended Android app for Bluetooth serial (free, by Kai Morich)
- Bluetooth SIG: Learn About Bluetooth — official overview of Bluetooth technology
- Random Nerd Tutorials: ESP32 Bluetooth Classic — additional Bluetooth Classic tutorials
Next Lesson
In the next lesson, we’ll add a potentiometer and LED to the circuit and use Web Serial with p5.js to build interactive visualizations and bidirectional controls—all running wirelessly over the Bluetooth serial link you just established. Let’s go! 🚀